Supreme Guide to Create Your Lead Magnet Landing Page with Leadpages [+Video]

Are you looking to create a high-converting lead magnet landing page for your business but you don’t know how?
Awesome, keep reading…
Perhaps you’re hoping to hire a cheap designer as long as he does ok work...
Or maybe you’re considering doing it yourself but you don’t have time to search for a complete tutorial.
Today, I decided to show you how to create your own landing page in a very detailed step-by-step guide. And you’ll see why you don’t need to be an expert designer to create a professional and high-converting page.
No matter if you’re a startup, entrepreneur, or freelancer, in today’s article, I’ll teach you how to build the perfect lead magnet landing page using Leadpages. A simple—yet very useful—tool to give your business the professional landing pages you’re looking for.
Plus, I’ll share with you a tutorial video walking you through each step of the process.
I’m doing this for your benefit so you can not only create your own lead magnet landing page but your entire website.
Now let’s start building and hit publish!
1. Go to www.leadpages.net.
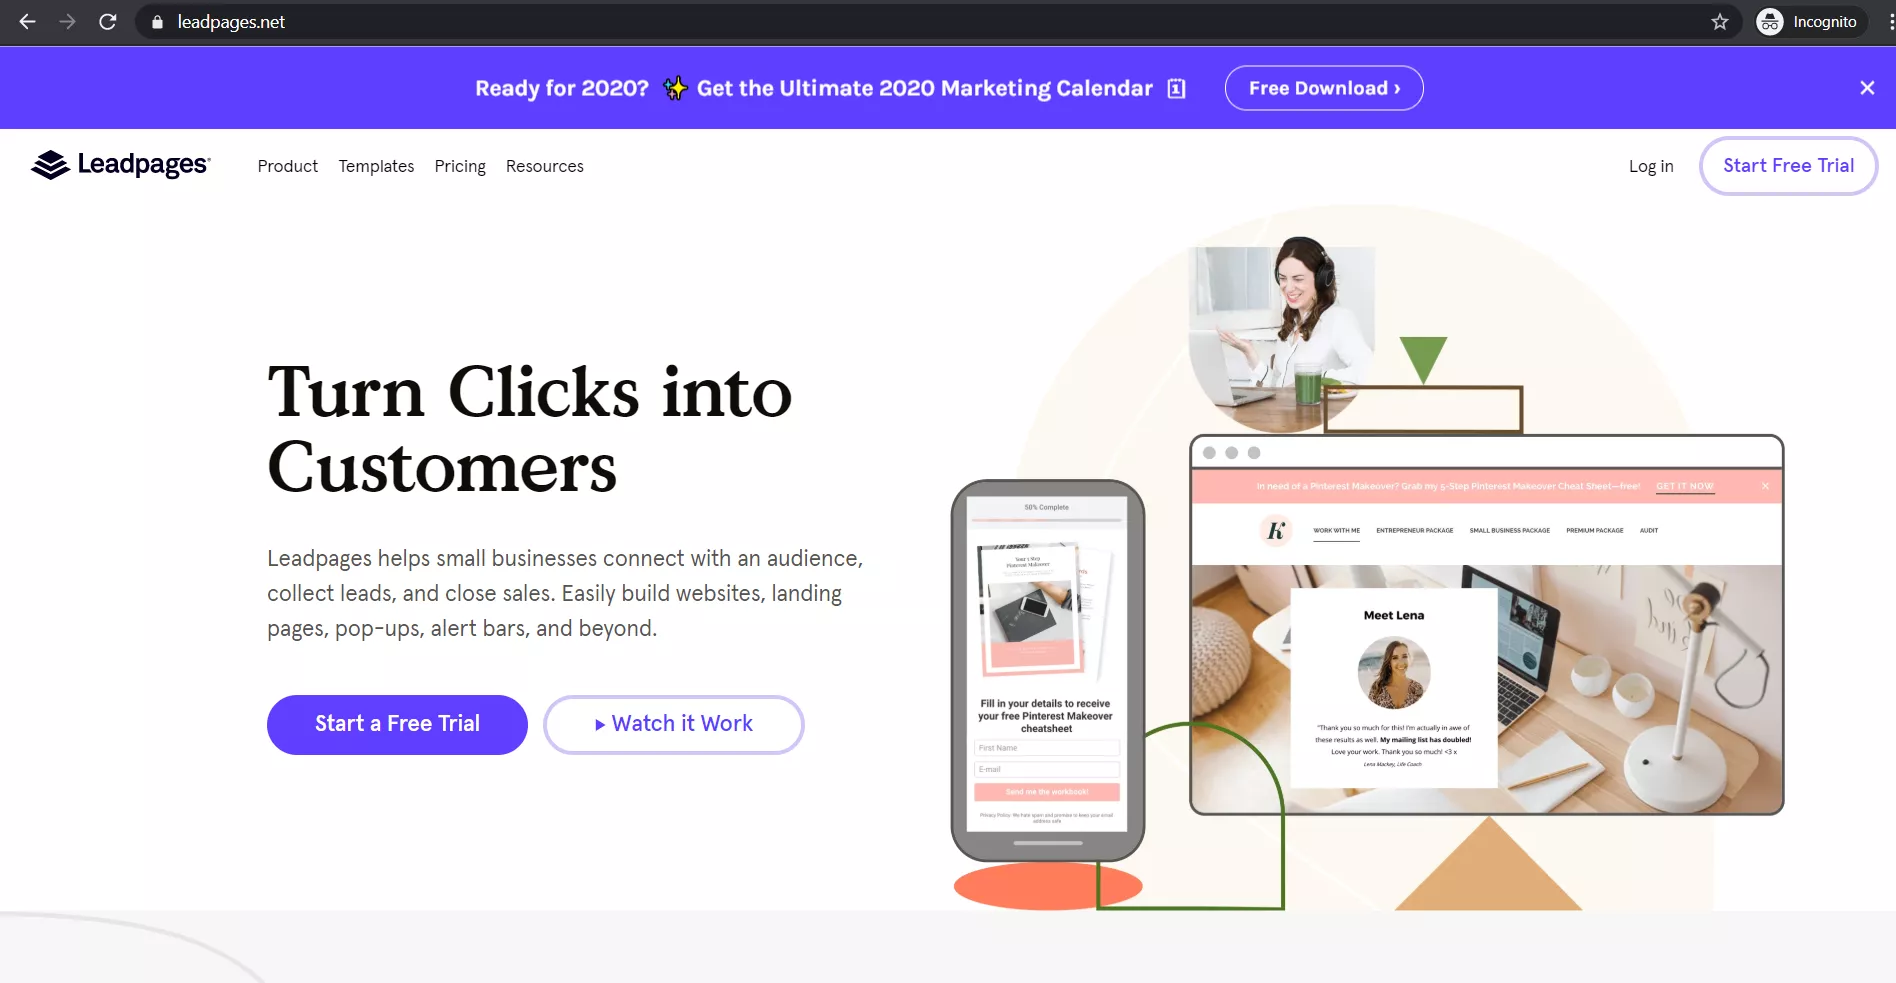
2. Once you land on their homepage, you’ll have 2 options.
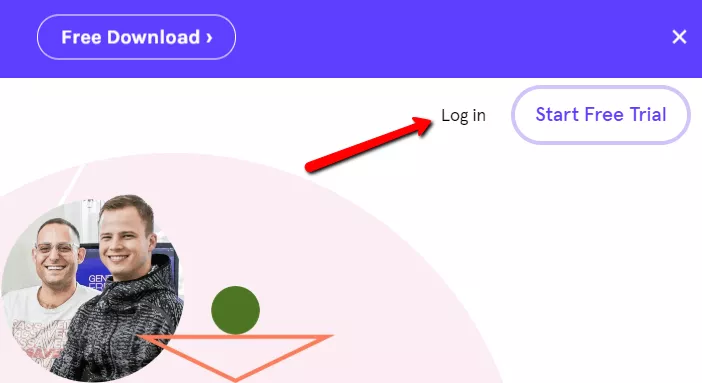
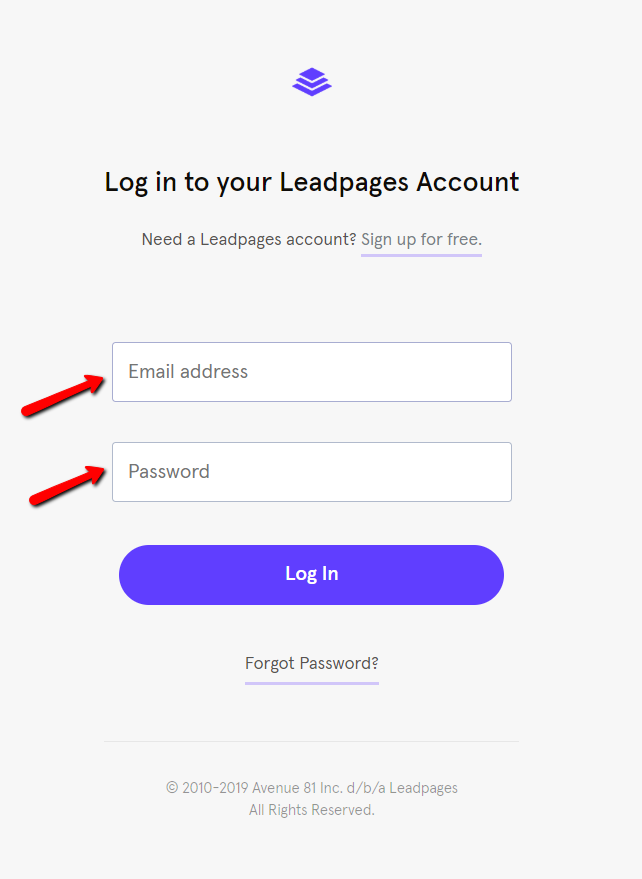
2.1. OPTION 1: Log In. If you already signed up for their free trial or have an account with Leadpages, click on “Log in” in the top right corner of the page.
2.2. Type your email address and password and log in.
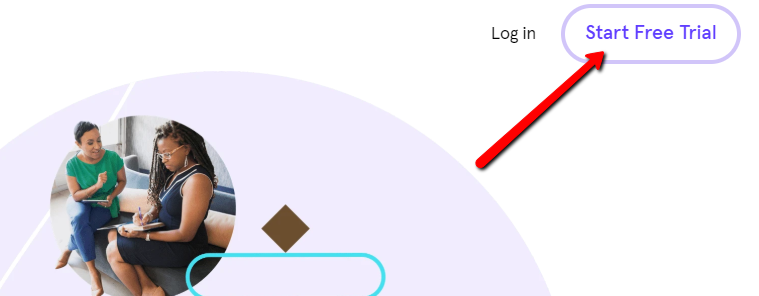
2.3. OPTION 2: Start Free Trial. If you’re giving Leadpages a try, click on the “Start Free Trial” button in the top right corner of the page.
2.4. Choose your preferred monthly or annual package

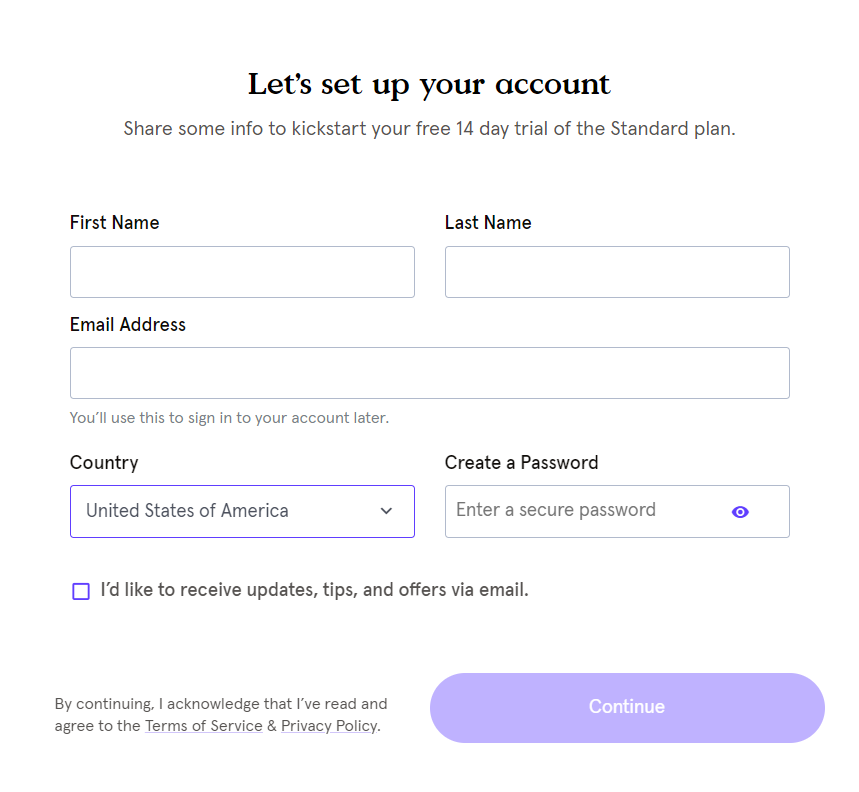
2.5. Fill out the form with your contact info and click “Continue”.
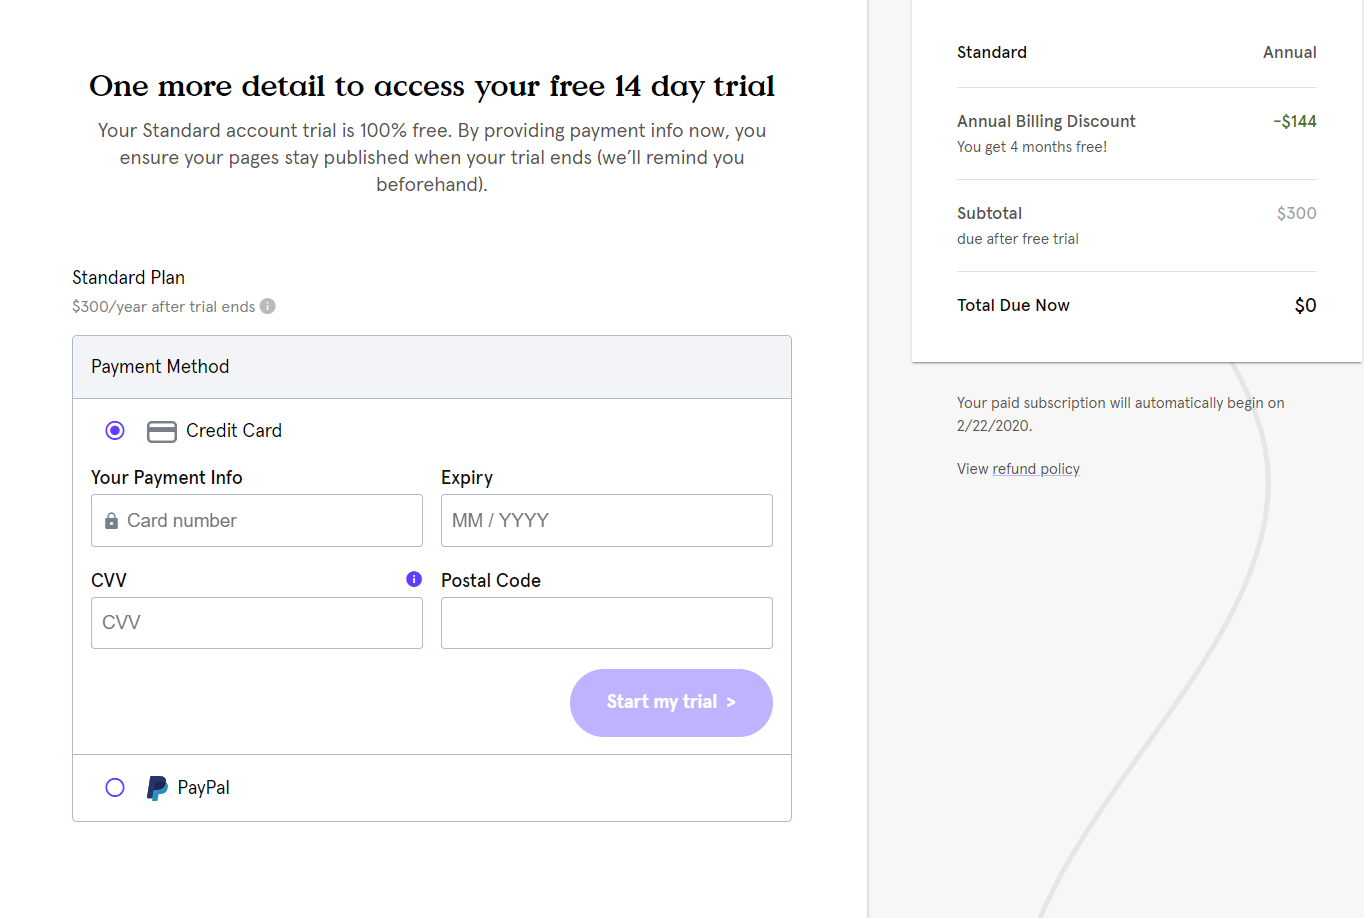
2.6. To start your free trial you must add your credit card information but you won’t be charged during the first 14 days. But you’ll have to cancel within those days to not be charged after the trial ends.
3. Now that you’re logged into your account, you have 2 options to start building your lead magnet landing page.
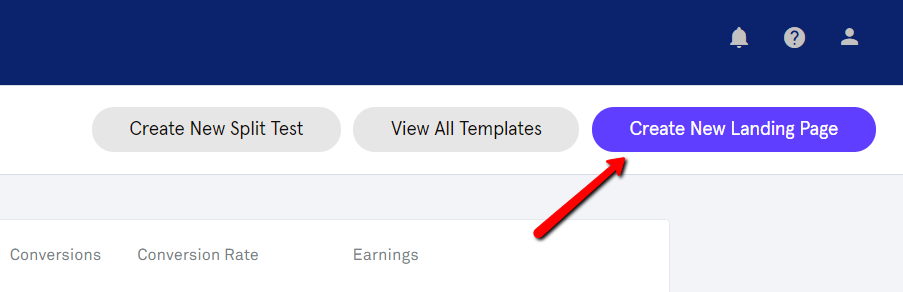
3.1. OPTION 1 (For More Experienced or Talented Level): After logging into your account, click on the “Create New Landing Page” button at the top right corner of the page.
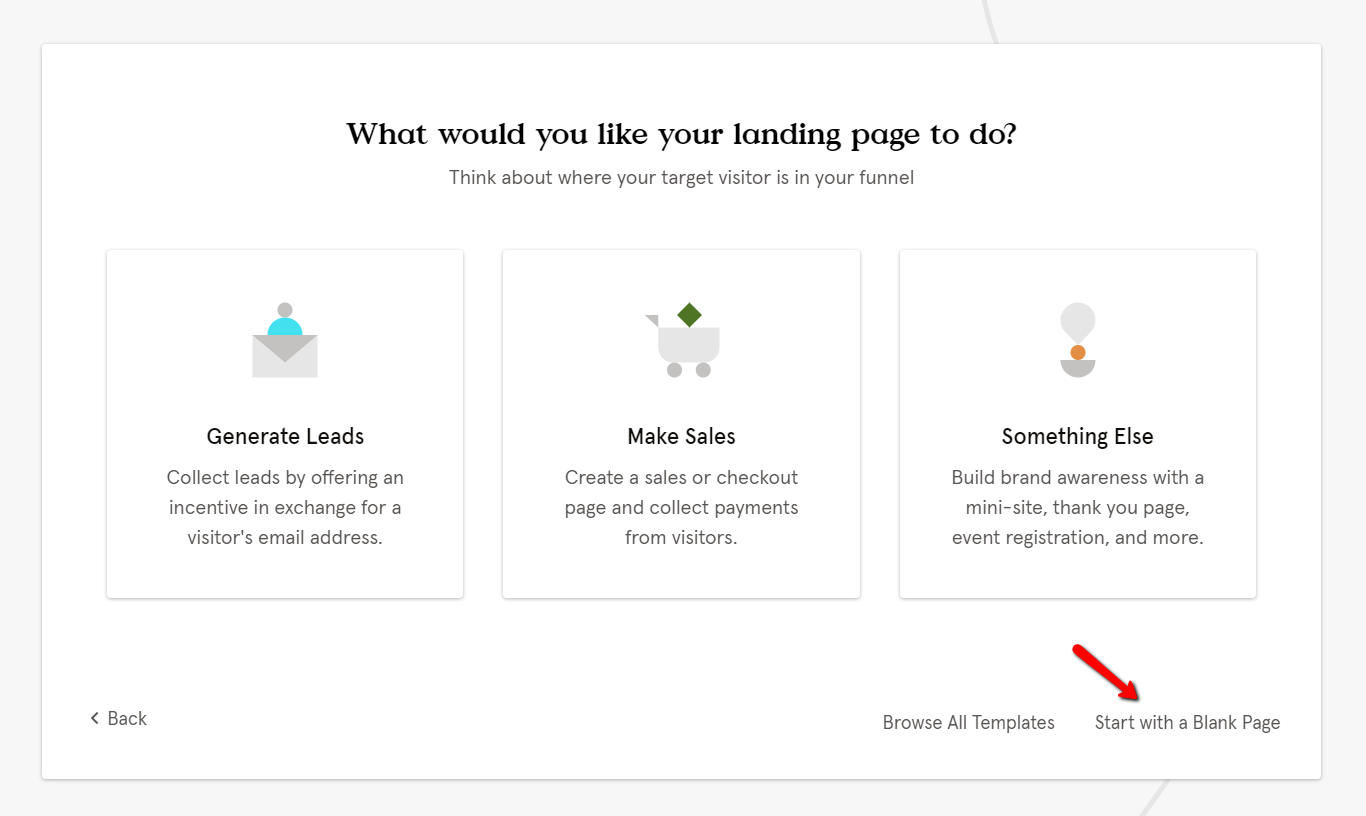
3.2. Click on “Start with a blank page” at the bottom right of the page to start creating your landing page from scratch. This option is for people who feel more confident on building the page with no templates to follow.
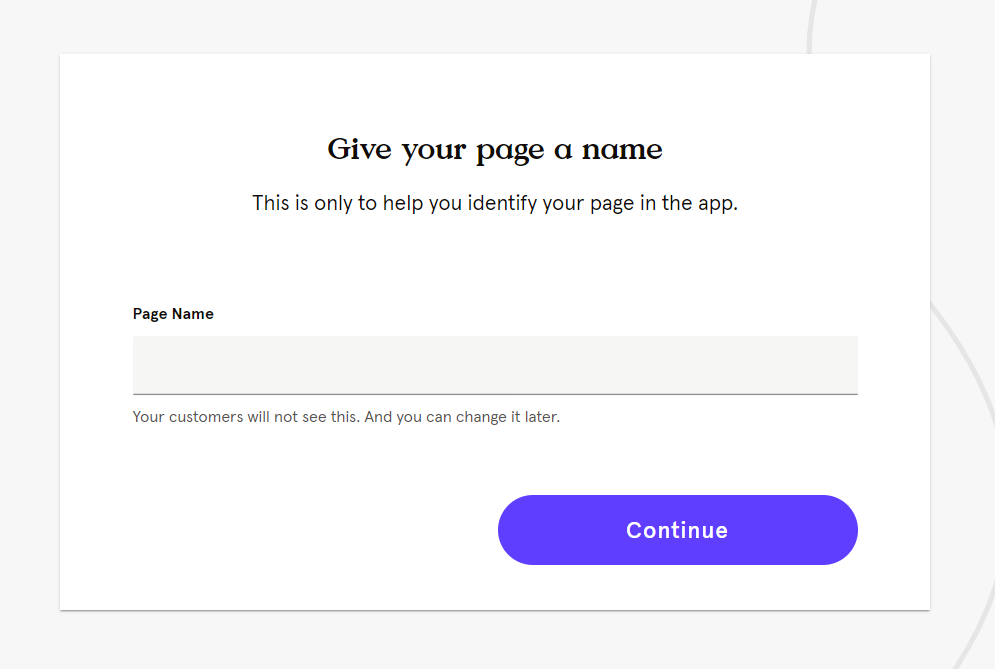
3.3. Name the page you’ll start editing and click “Continue”.
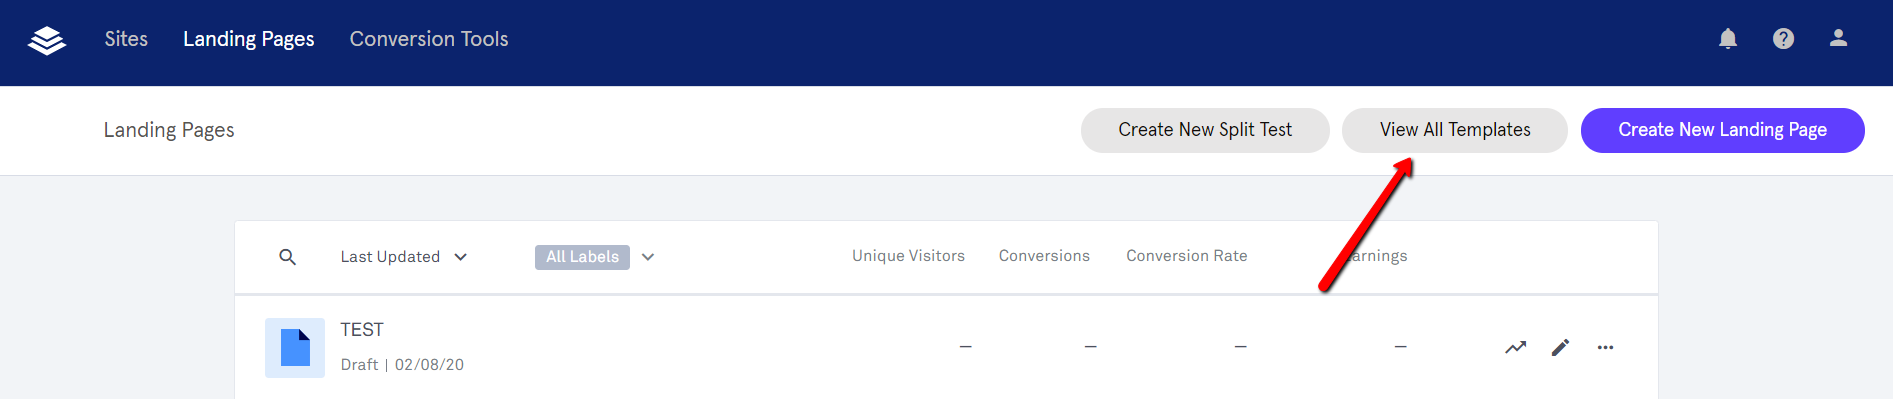
3.4. OPTION 2 (For Beginners): If you’re new in Leadpages or you aren’t a professional designer, this option is the best for you because it’ll let you work on templates already made that you’ll only customize. So click on “View All Templates” in the top right corner.
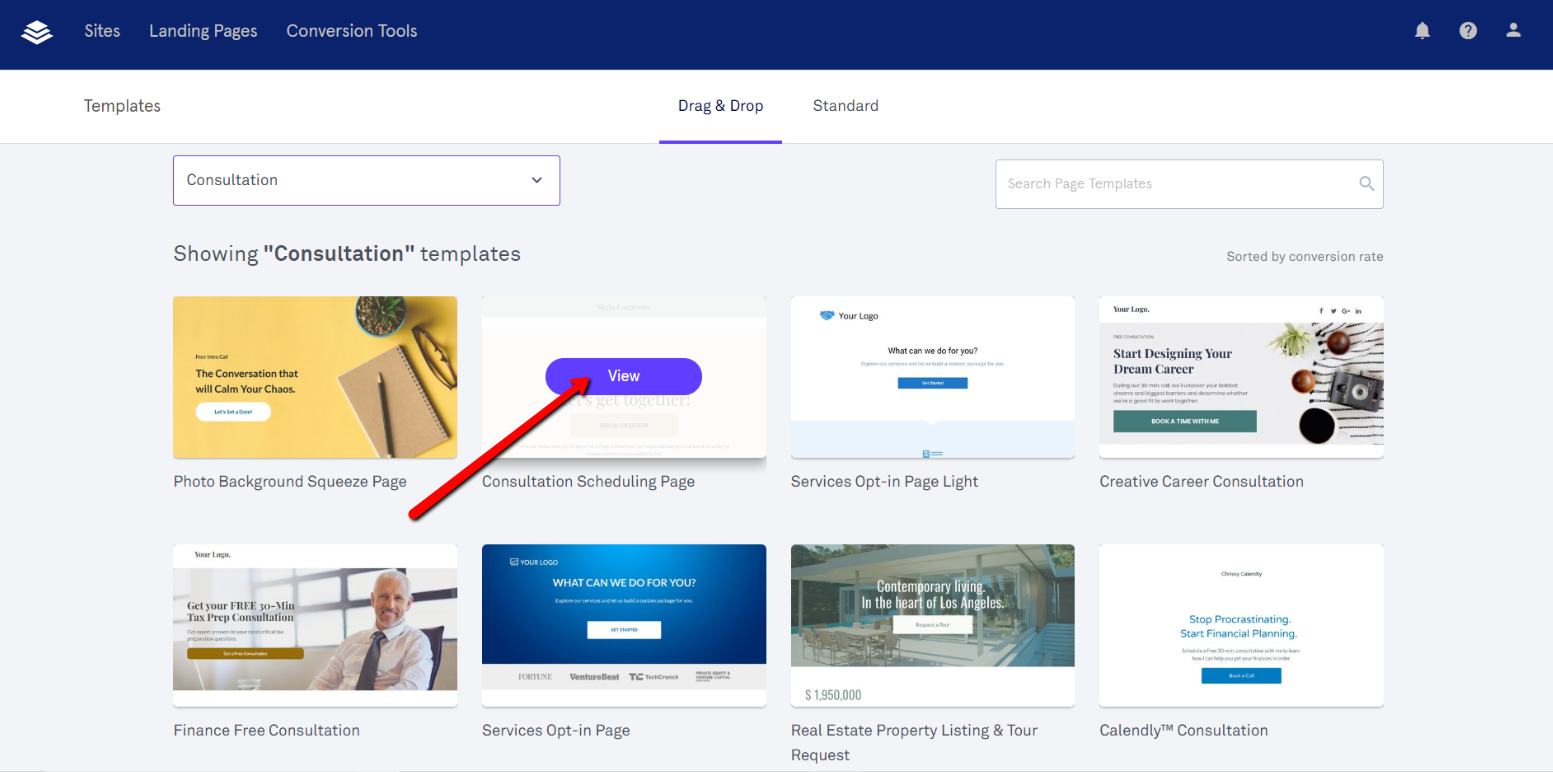
3.5. After clicking on “View All Templates”, you'll see different templates design that you can choose from. All templates include pre-built sections with placeholder widgets that you can edit and customize.

3.6. If you click on “All Types” in the top left corner of the page, you’ll see the different categories of templates that you can search for. If for example, you’re looking to build a consultation page, just choose “consultation” and view the different templates there are.
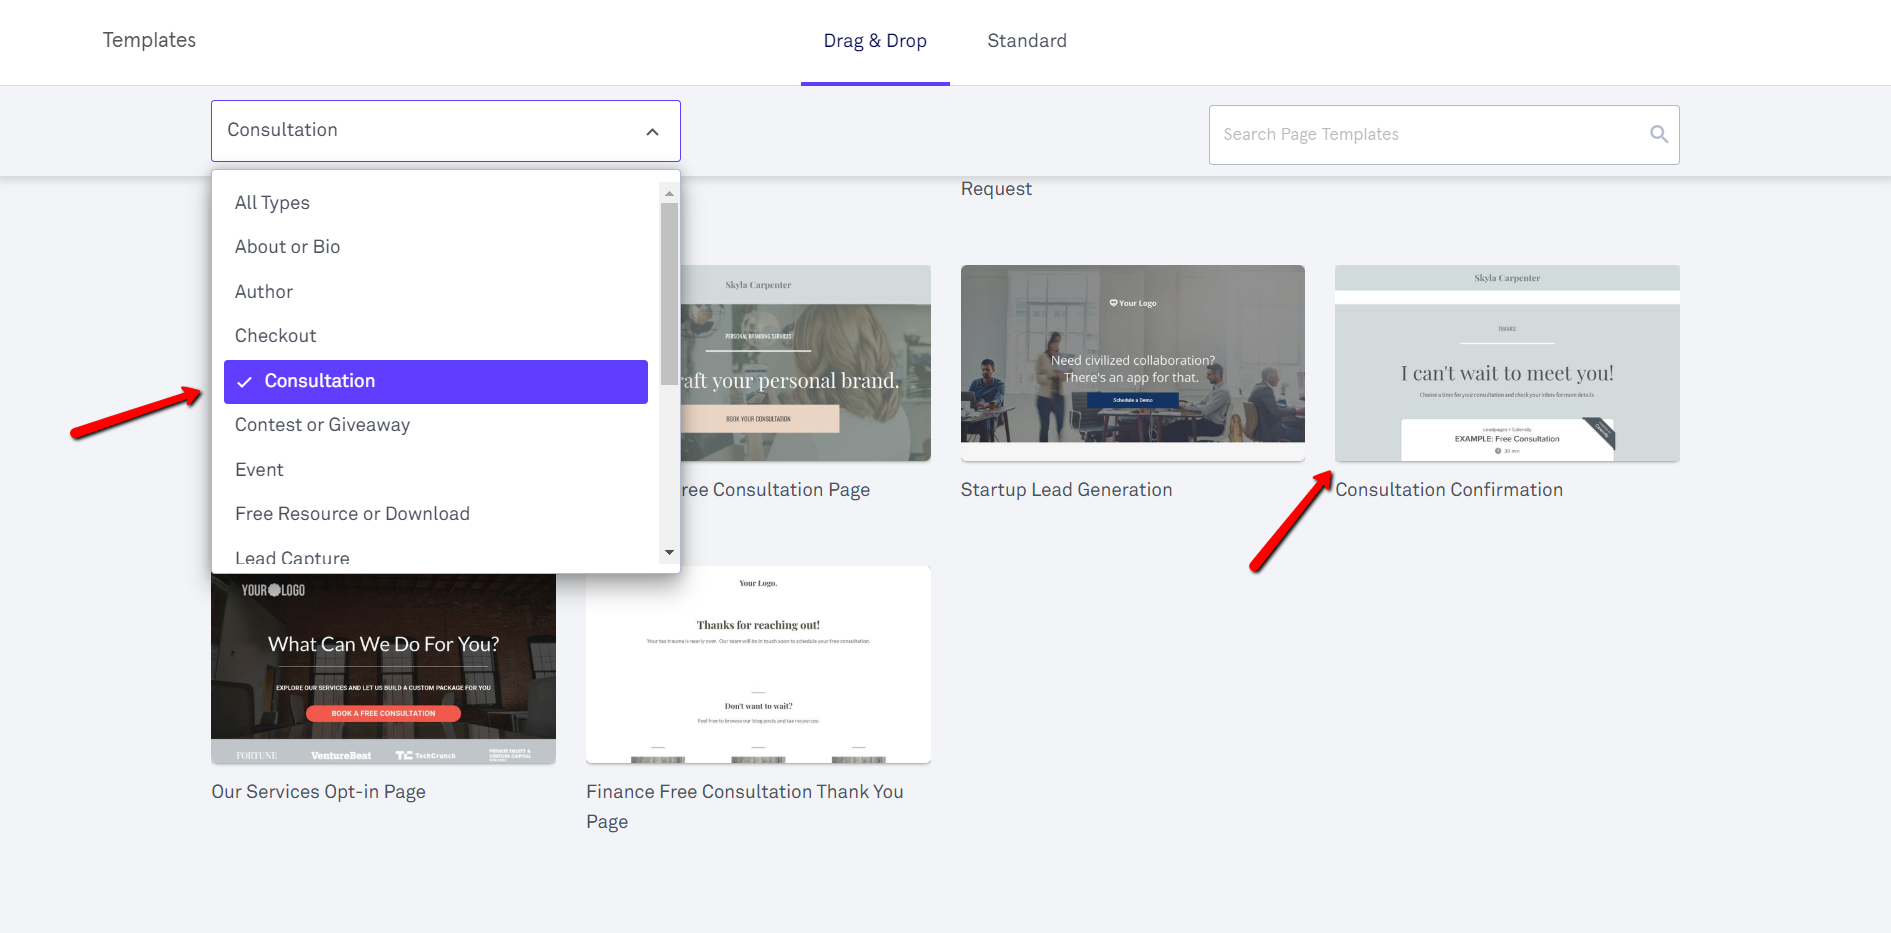
3.7. If you want to see a preview of how a template looks like, just click on the “View” button on each template.
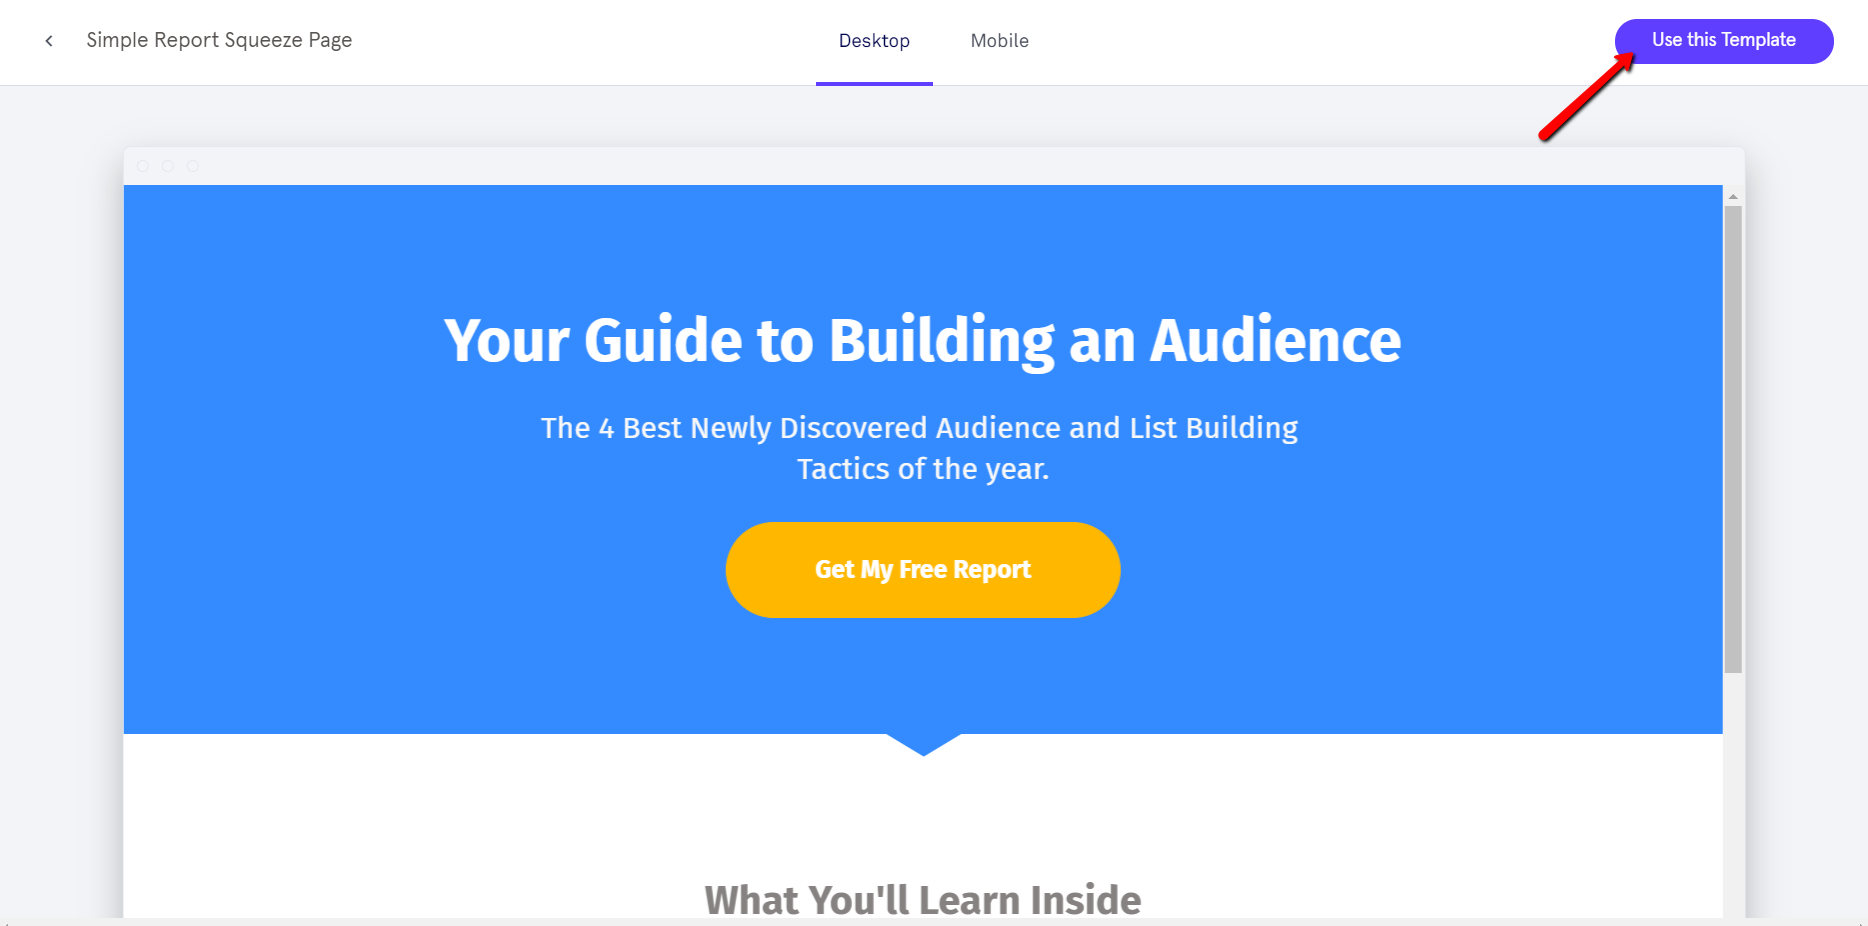
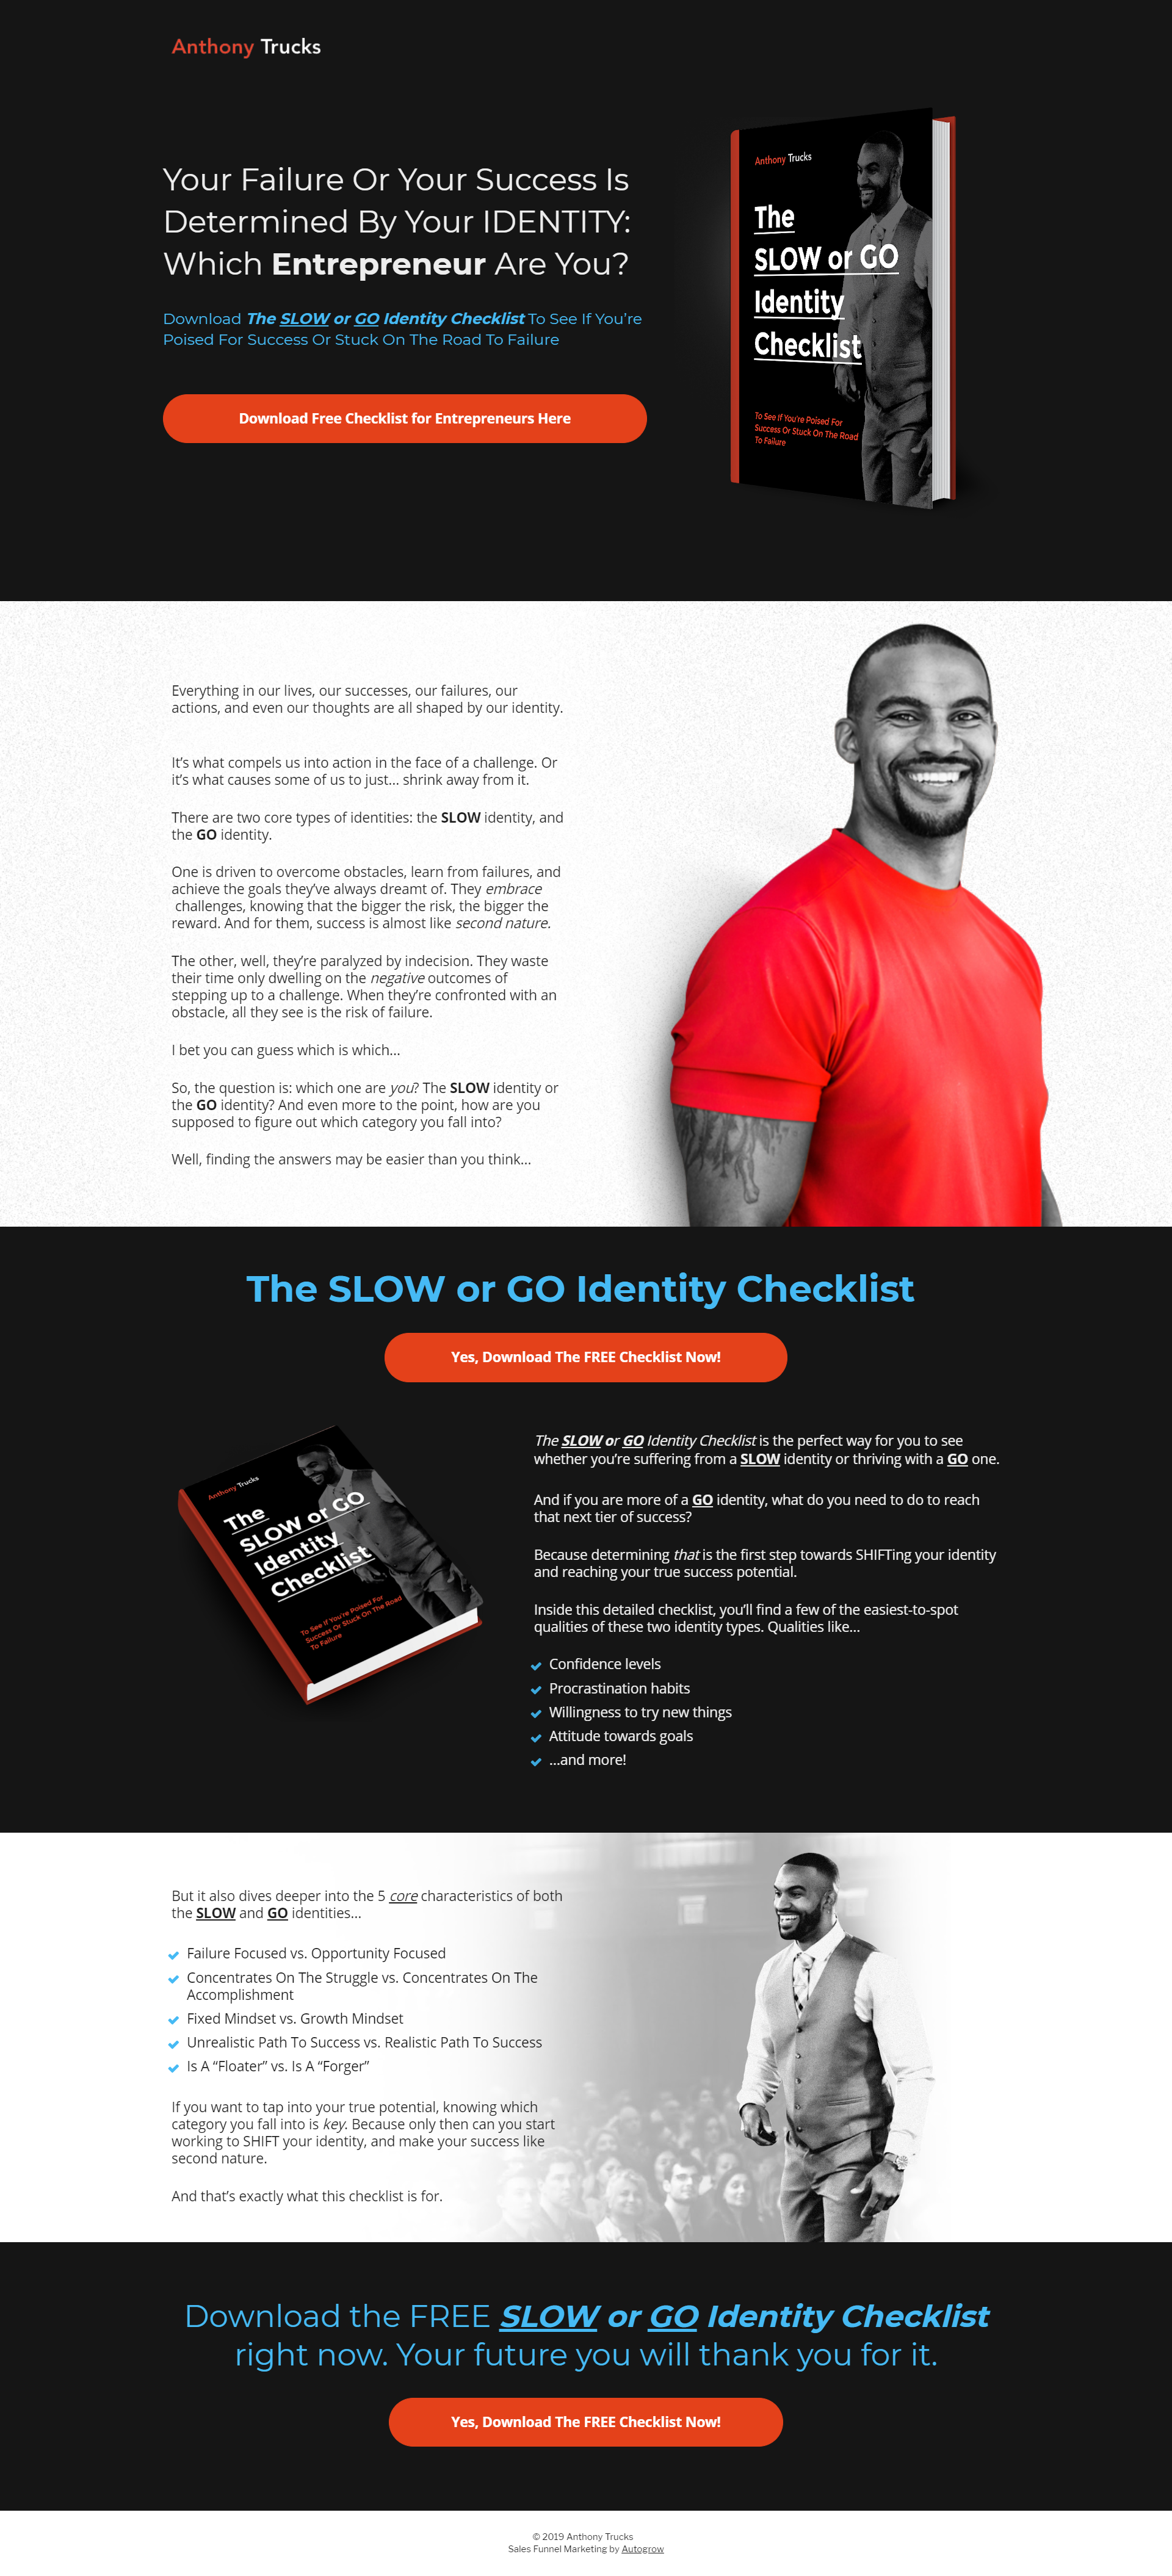
3.8. Choose your preferred template by clicking on “View”. I’ll choose the template below for your reference. This is actually a high-converting template for lead magnet landing pages that we often use at AutoGrow and converts pretty well.

3.9. Click on “Use This Template” in the top right corner of the page to start editing your template and build your page.
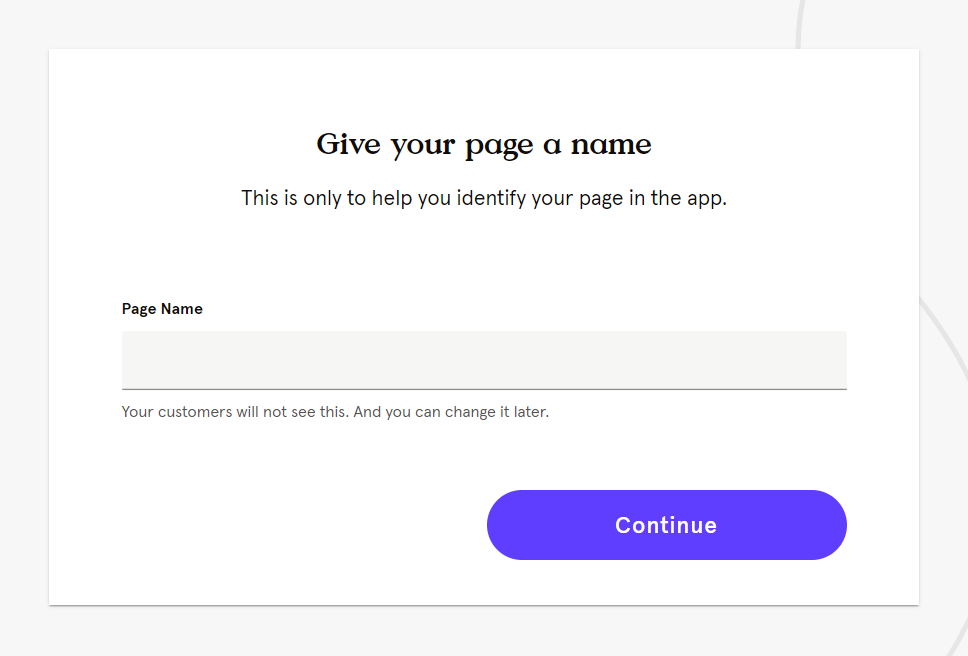
3.10. Name the page you’ll start building. This name will help you to easily identify all pages you create. Then, click on “continue”.
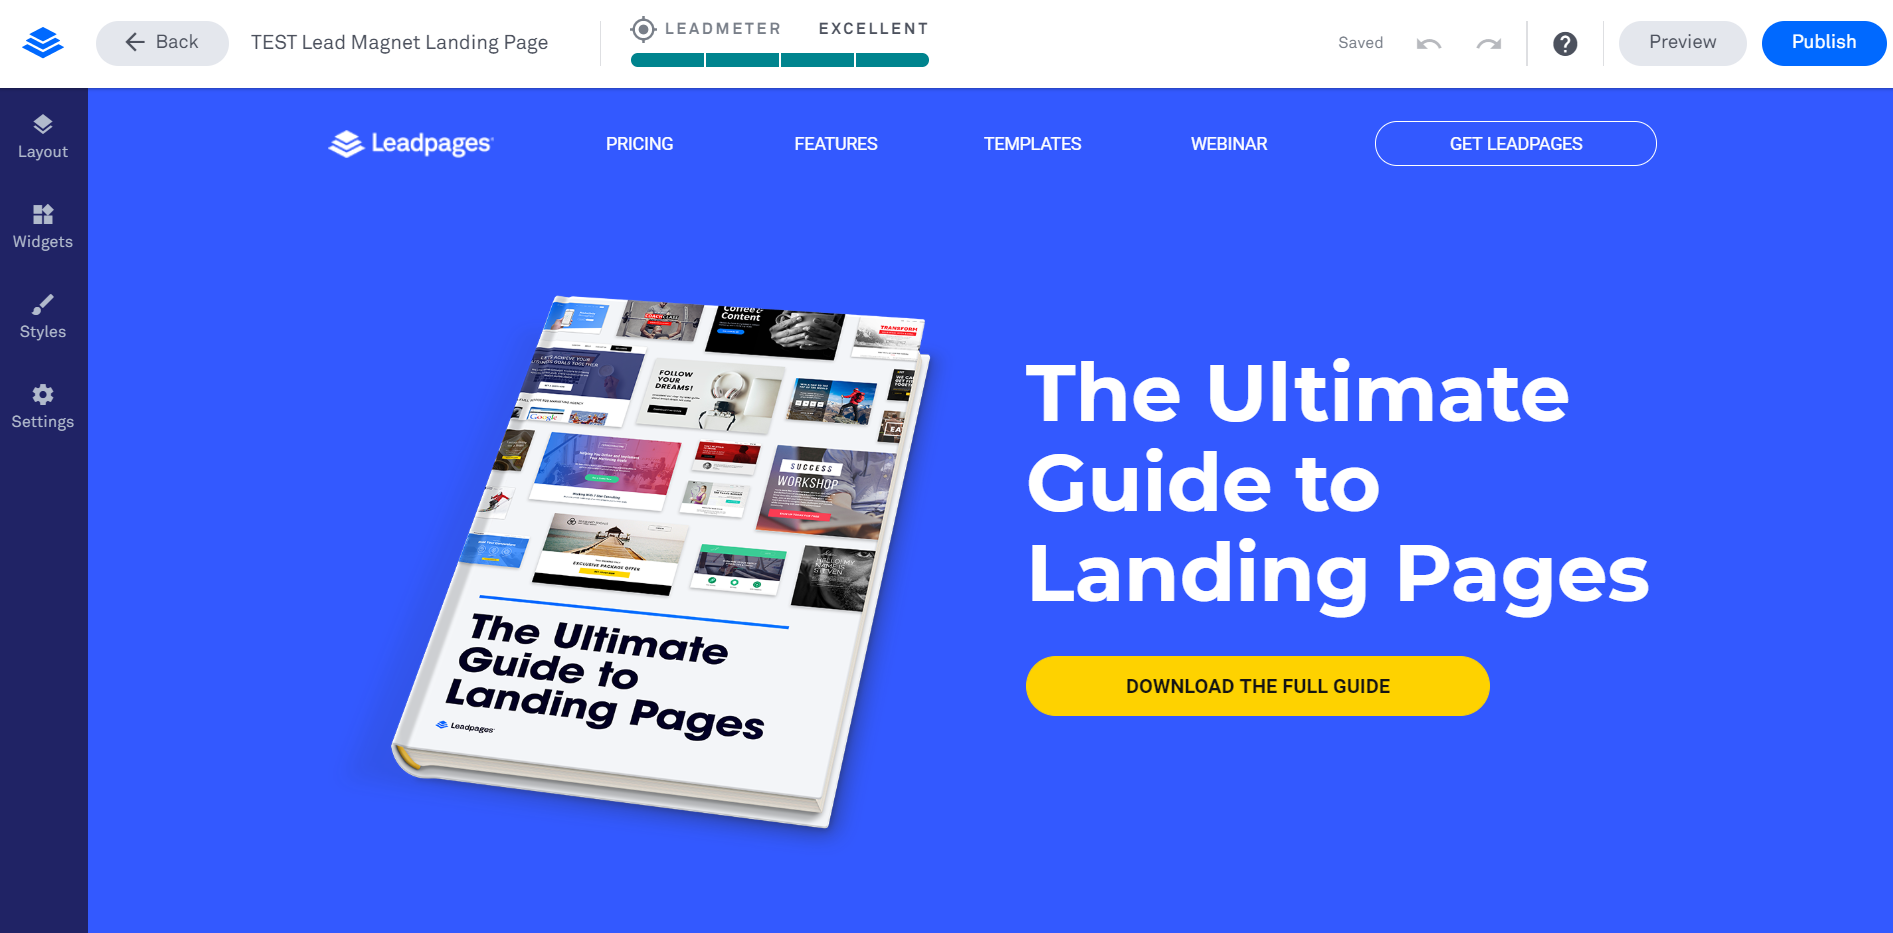
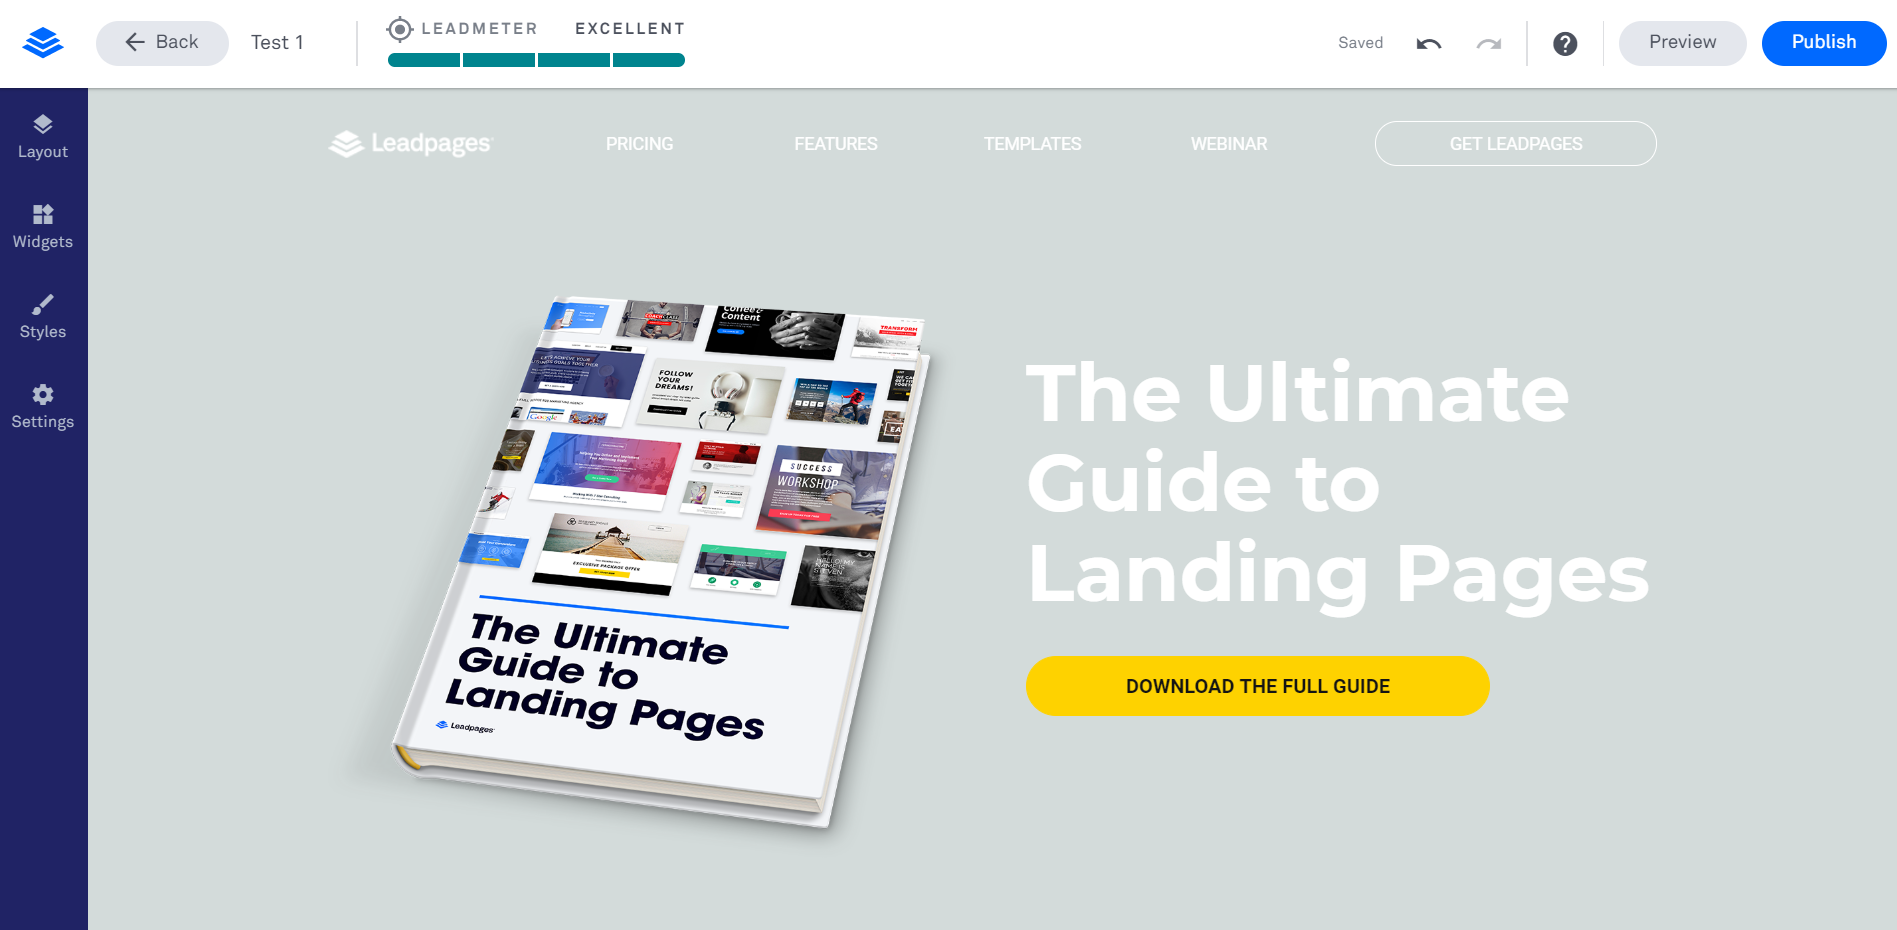
3.11. Your template will be displayed on your screen like this.
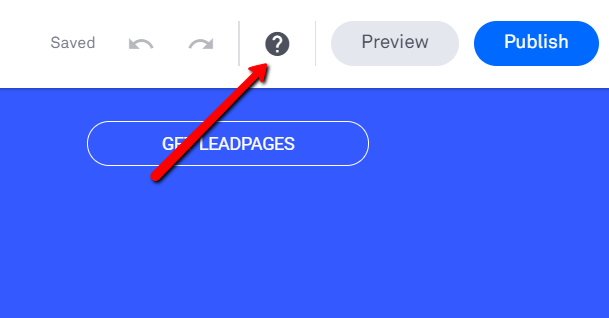
4. Now it’s time to start editing your template. But let’s get familiar first with some useful features and tools you may need. The first one, if you need any assistance or help from the Leadpages support team, there’s a question mark button in the top right corner of the page.
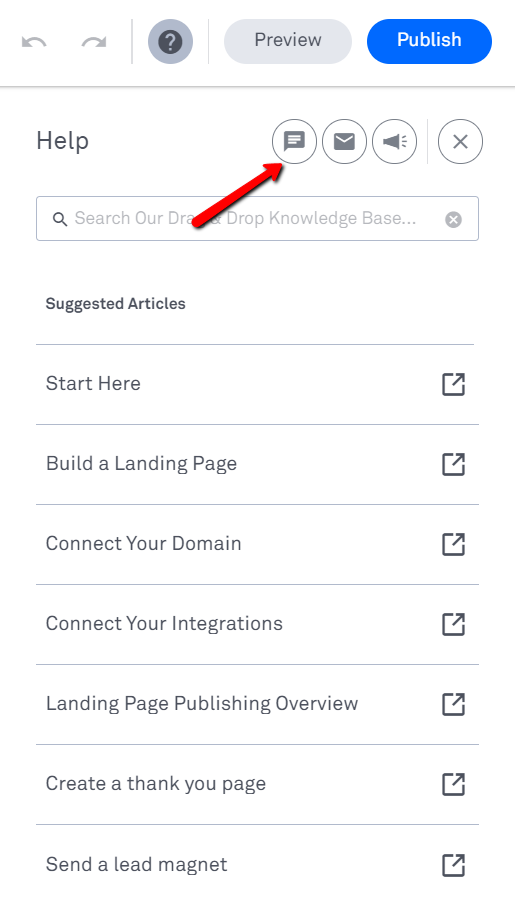
5. Different options to contact their support team will be displayed. You can get to chat with someone from Leadpages support, open a ticket request, read a FAQ section, and some other options.
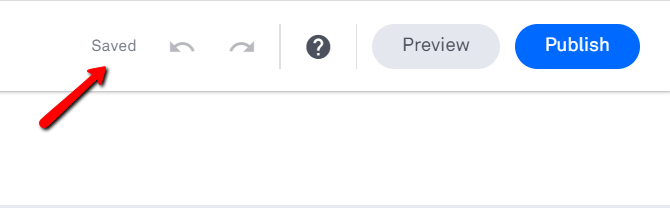
6. At the top right corner, you’ll see 2 arrows to undo or redo your last edits. Your work saves automatically so no need to save your work manually.
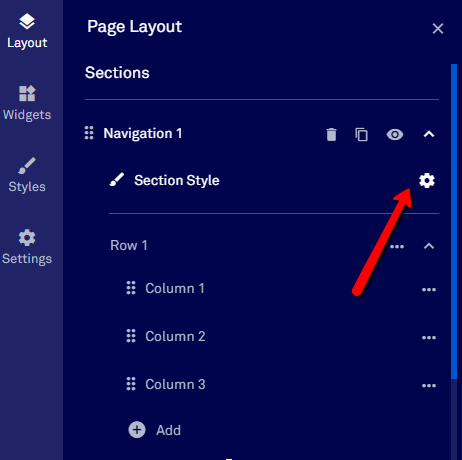
7. At the top left corner, there’s a dashboard that says “Layout”. With this tool, you’ll be able to customize settings for all sections. You’ll change the width and heights of rows, columns, and images, you’ll adjust any layout settings, and rename any section.
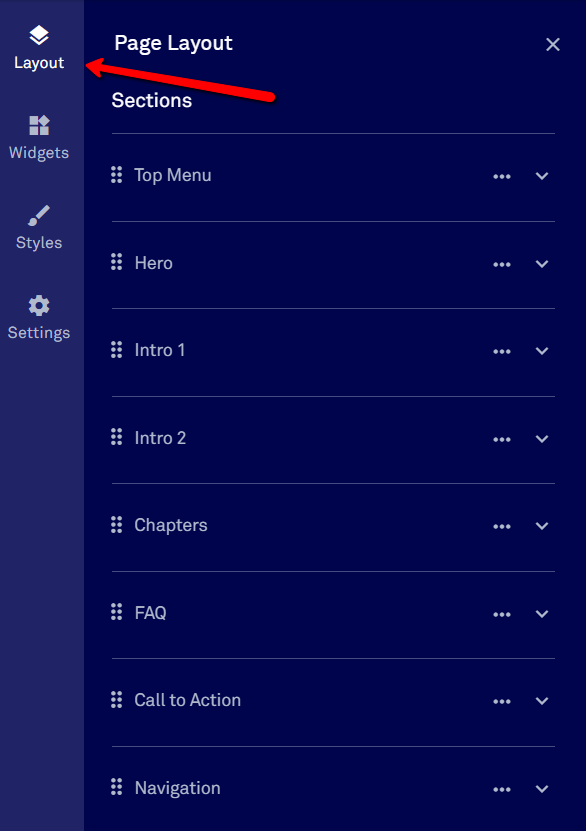
8. Each template design has different sections for text, images, columns, rows, titles, and footer. So when you click on “Layout”, you’ll see all sections of that template displayed. If you want to rename any section, just click on the pencil icon next to the name of the section. These names won’t be displayed on your live page. It’s just an easy way for you to build and customize all sections.
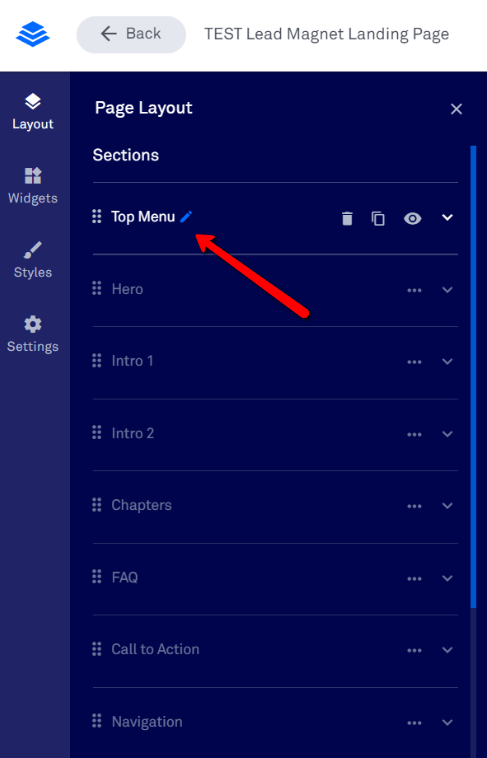
9. Rename the section and click “Save”. In the example above, I renamed all sections of the landing page I’m creating with a very basic copywriting structure we follow when writing copy (headline + subheadline, pain points, benefits, call to action, footer).
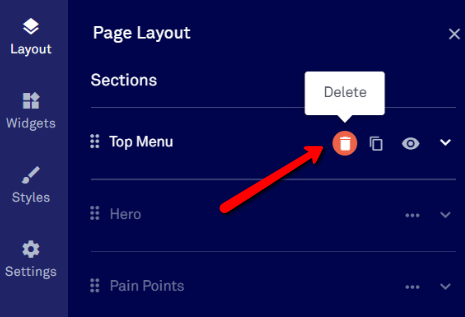
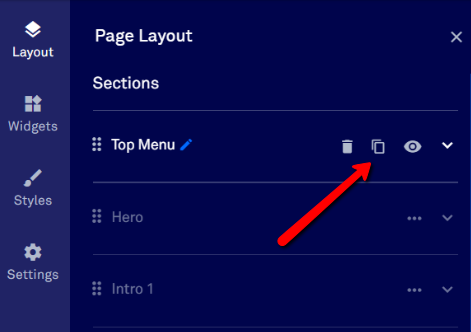
10. In order to remove any section that you won’t need, just click on the trash icon beside each name’s section.
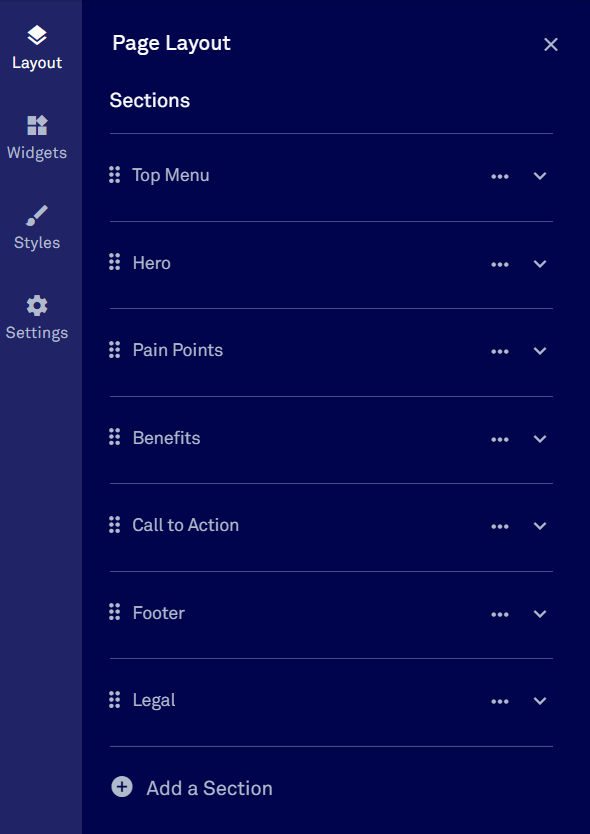
11. If you want to rearrange your sections, just click on the 6 dots to the left of your section name, drag and drop it where you want it.

12. If you want to add a new section to your existing ones, just click on “Add a Section” at the bottom of the left-sided menu. You can add as many sections and rows as you’d like, and up to 6 columns per row. When you create any high converting landing page, you don’t want to overwhelm your site’s visitors by having too many sections and information. So try to keep it simple and limit the number of sections.

13. If you want to duplicate one section, just click on the “Duplicate” icon in the layout menu and start customizing it.
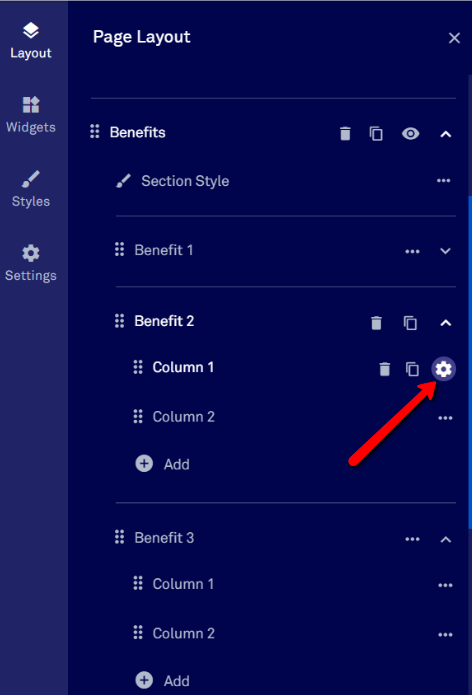
14. For customizing a specific element in one section, click on the section you want to customize, see displayed the elements of that section, and click on the gear icon. In this case, I’ll edit one column from that section.
15. Modify the margins and paddings for each element of your section by moving the white circle to add or reduce margins and padding.

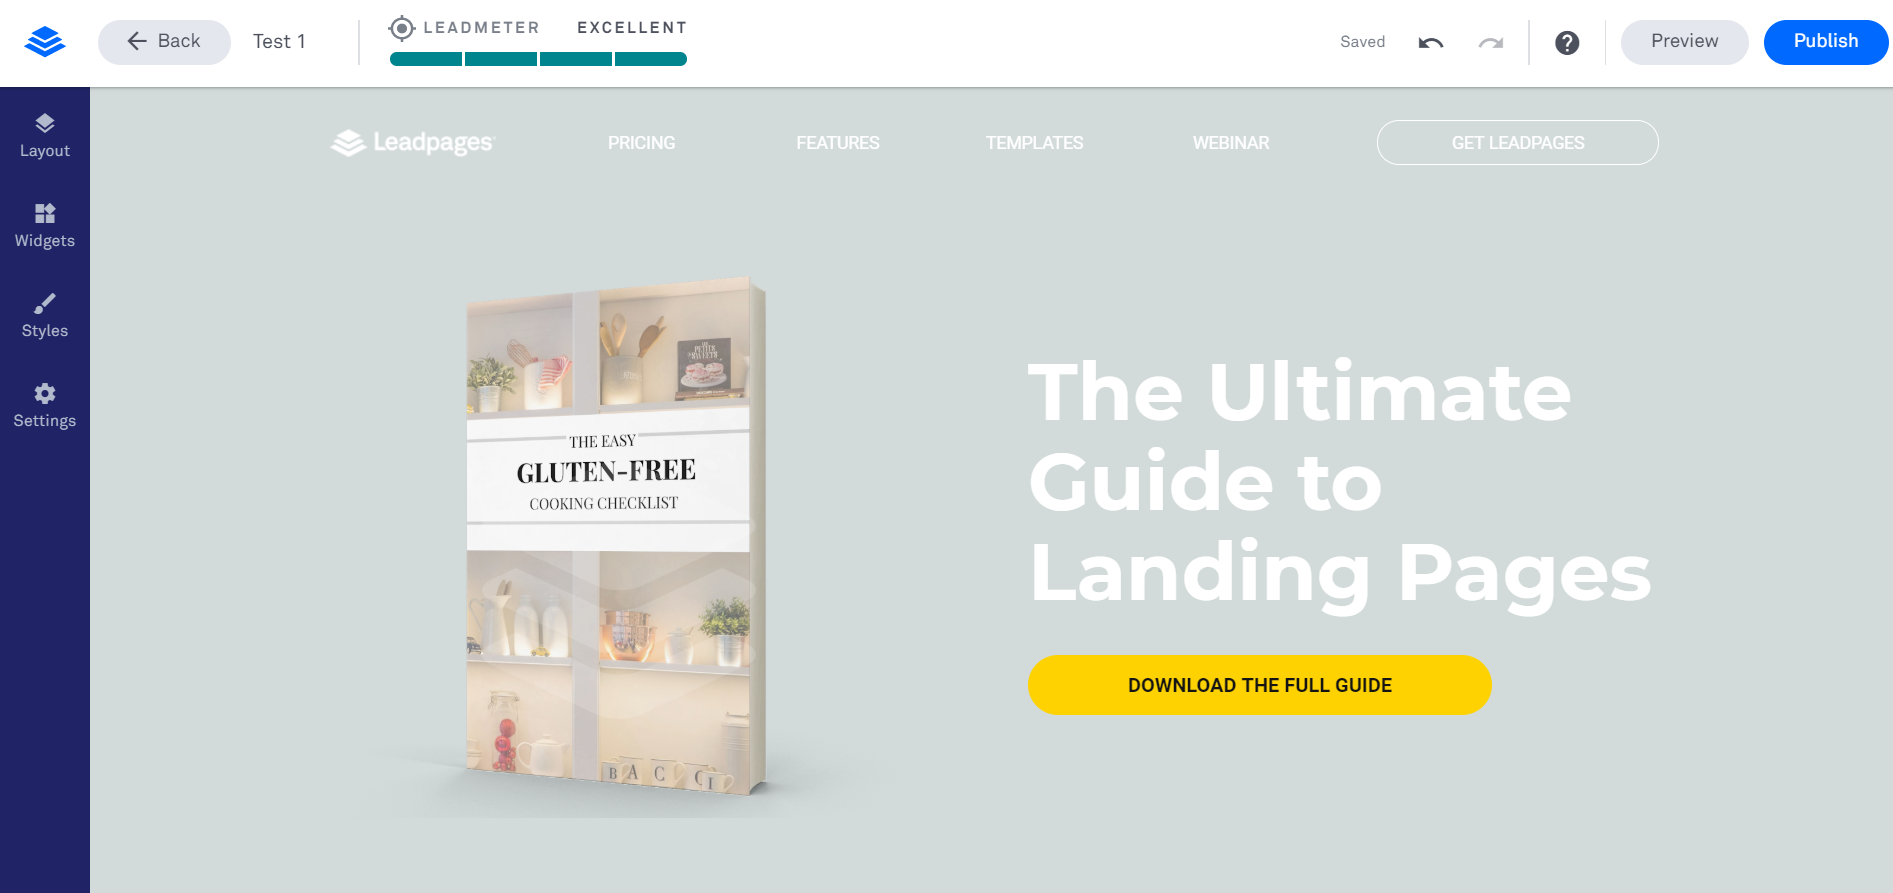
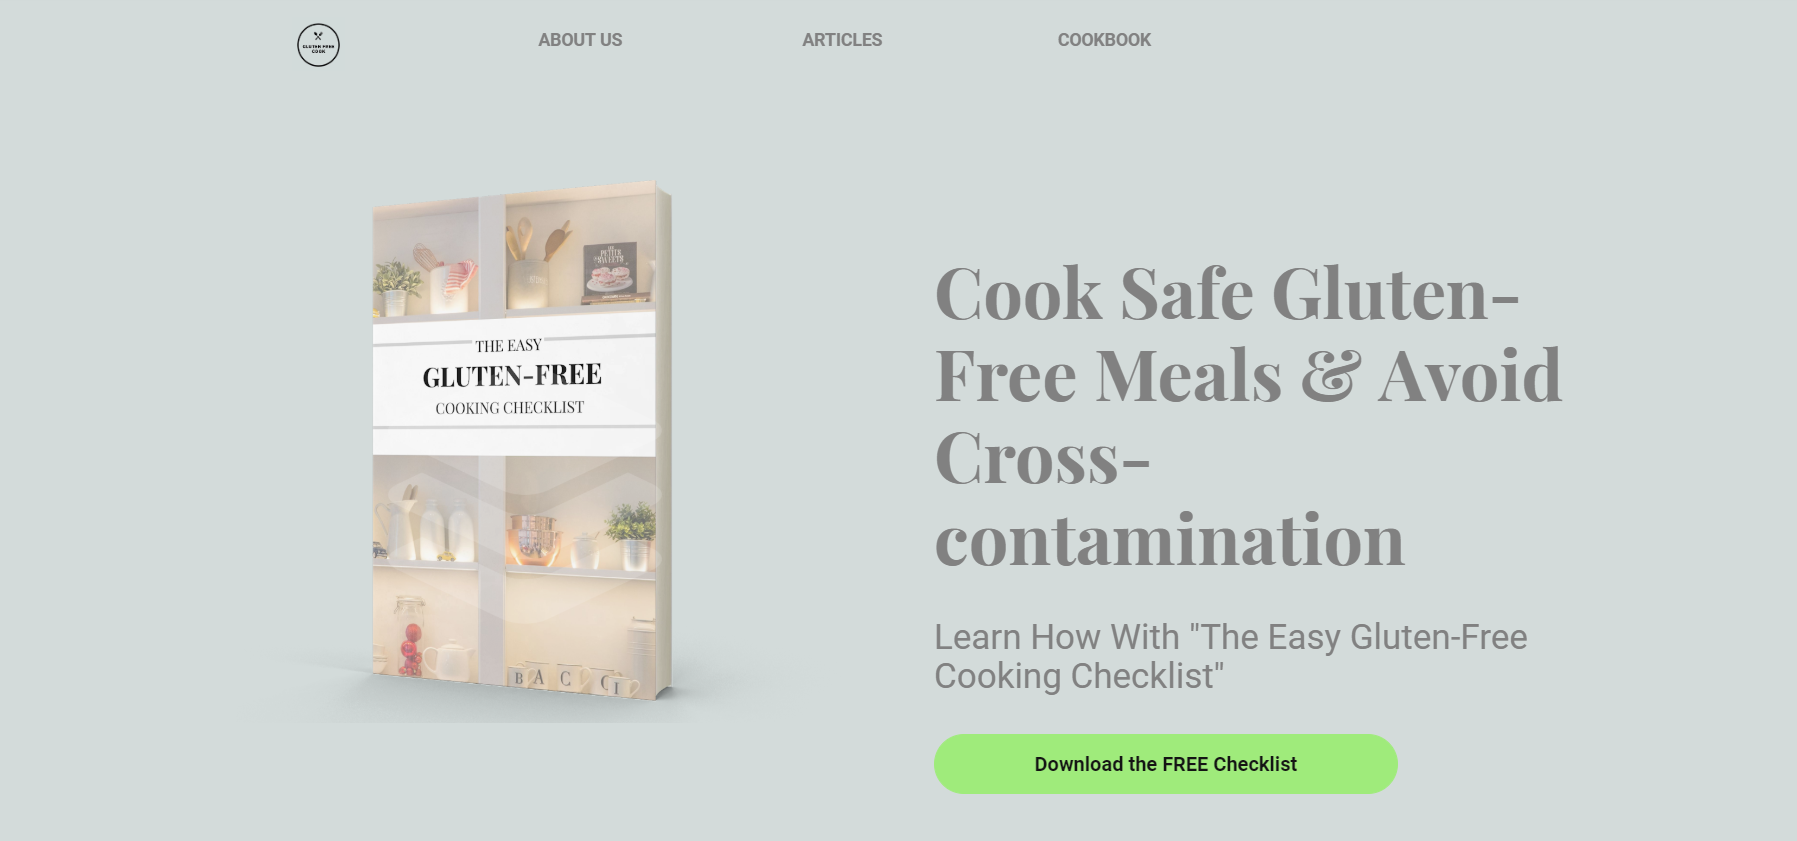
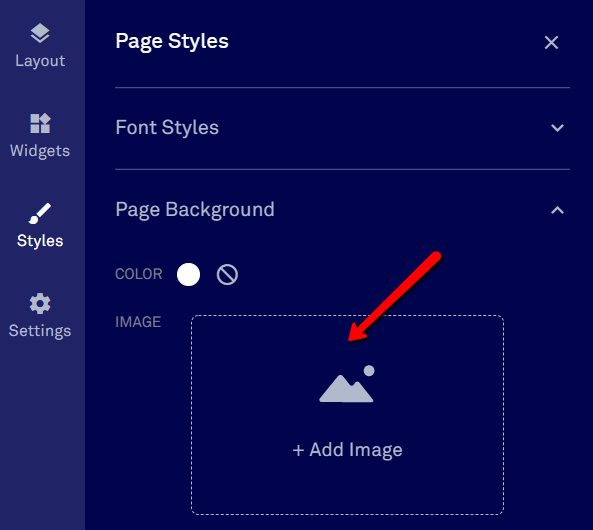
16. If you want to add a background image for that column, click on the “Add image” dashboard. You can also add a background image for a full section. Let’s say we’re building a landing page for people to download a gluten-free cooking checklist. For that, I’ll change the background color for the first 2 sections of my page: navigation and hero section. See how I changed the blue background to light gray following this simple step?
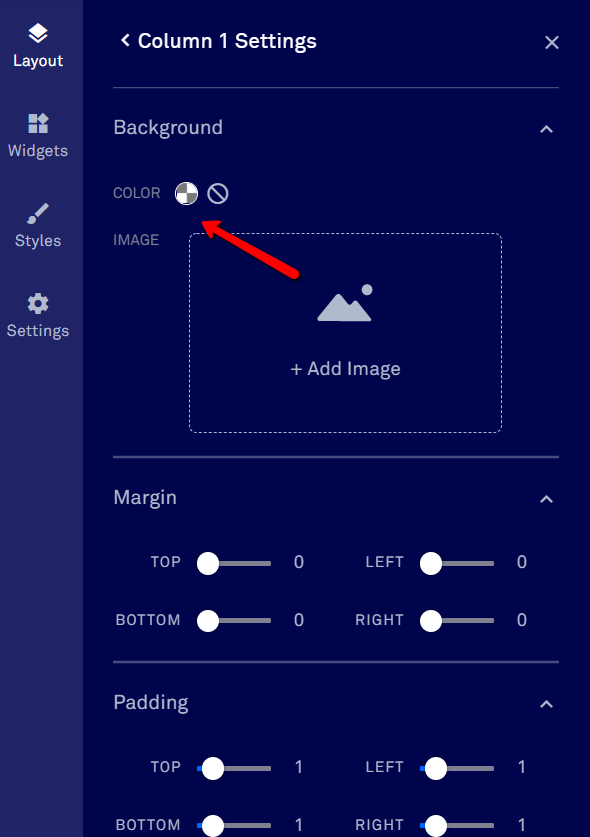
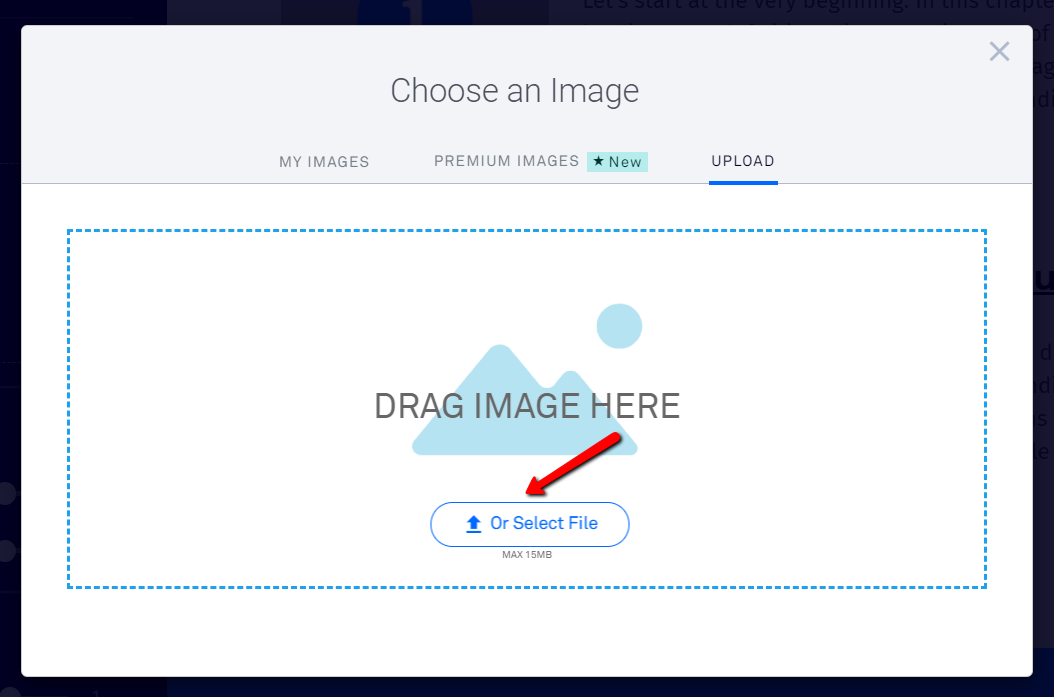
17. Upload your lead magnet image from your computer. Remember that if you add an image, you can control its placement, size, and alignment. To increase the padding parameters to create space between section edges and your content, just click “Padding” as I showed you in the steps above. For the hero section, let’s add a mockup of the gluten-free cooking checklist people will download from this page.
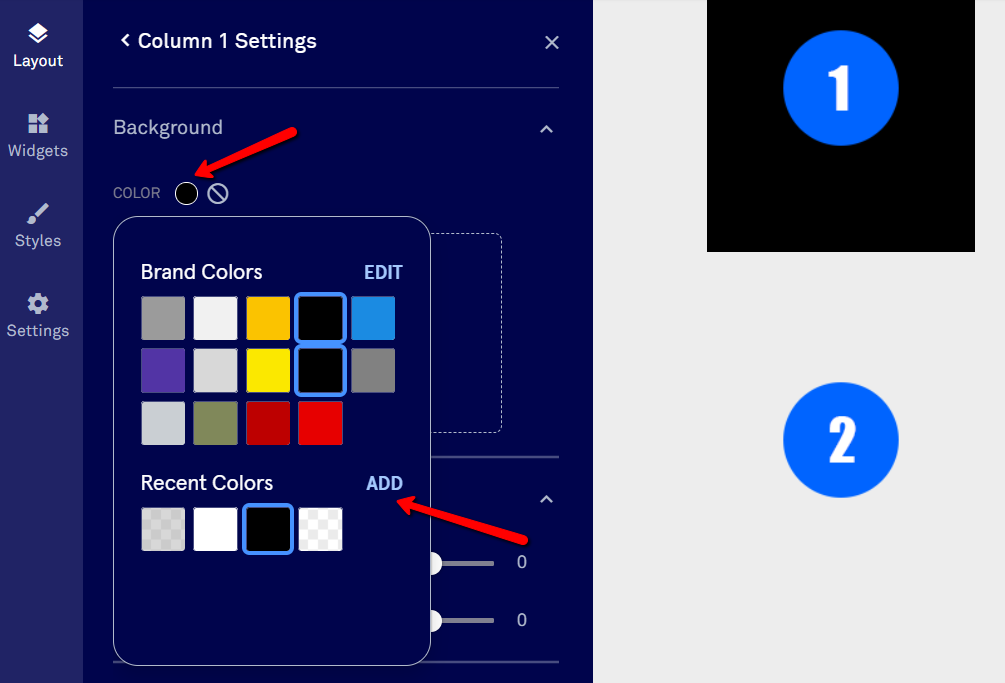
18. If you want to add a solid color and/or a transparency layer for that column background, just click on the circle next to “color”.
19. Then select the color you’d like to choose from your brand colors, recent colors, or just click ADD next to "Recent Colors" to enter hex codes or select a different color for your background.
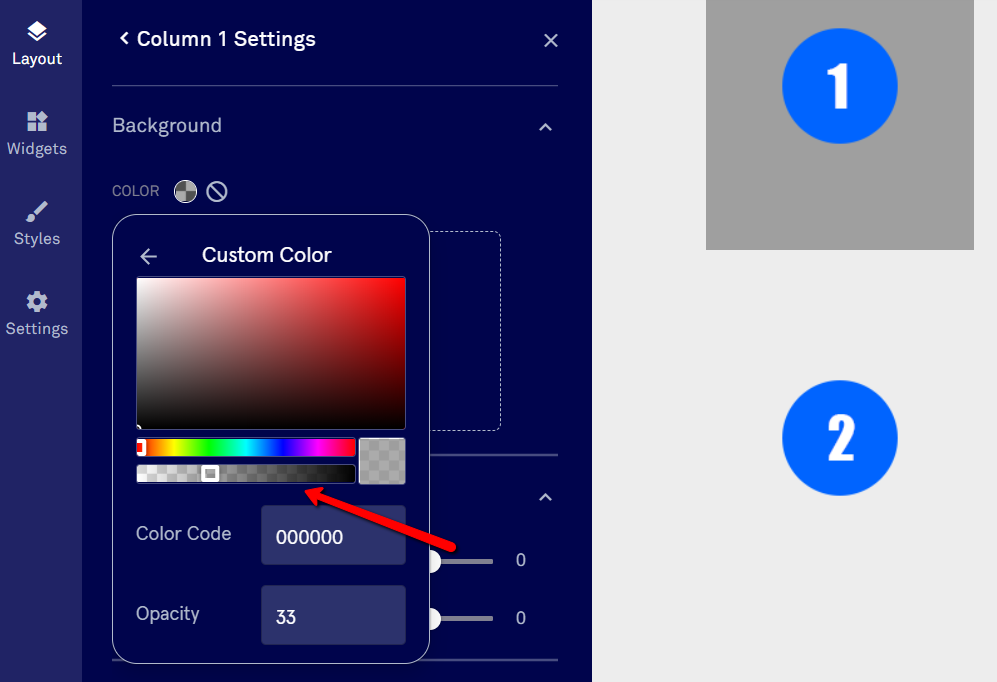
20. And customize the transparency option if you want to add a transparency layer to your solid color.
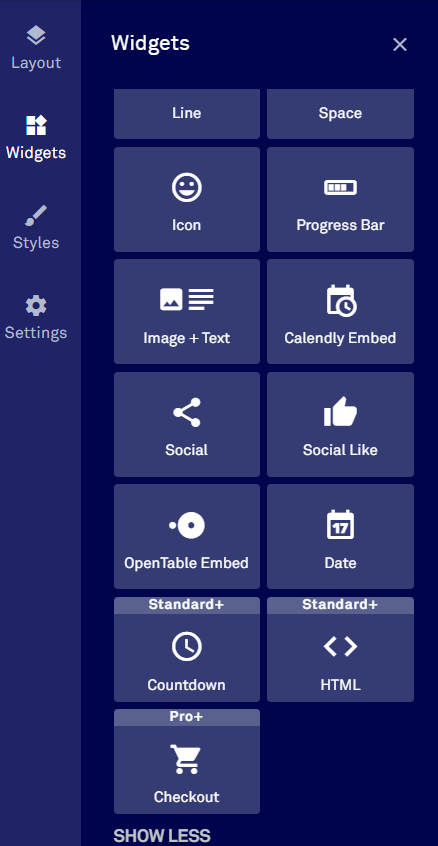
21. If you want to add any widgets to your sections, click on the “Widgets” dashboard in your left-sided menu.
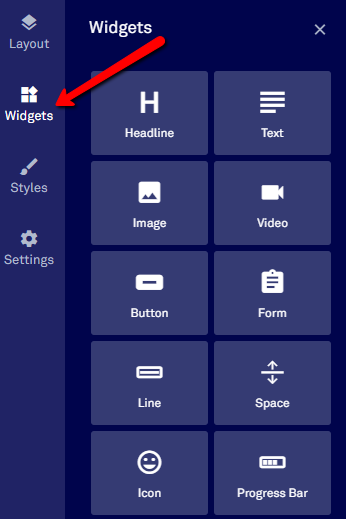
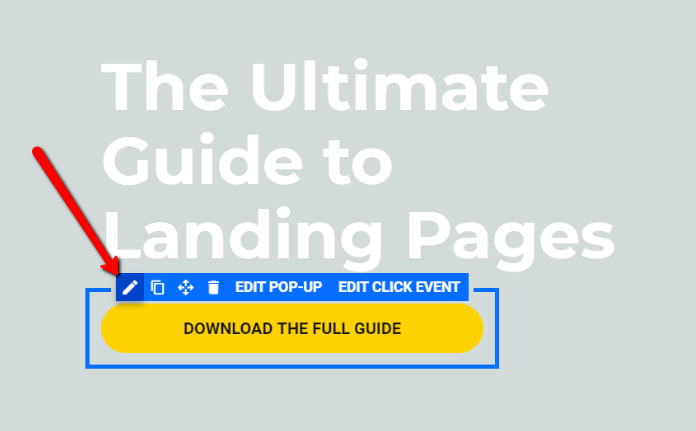
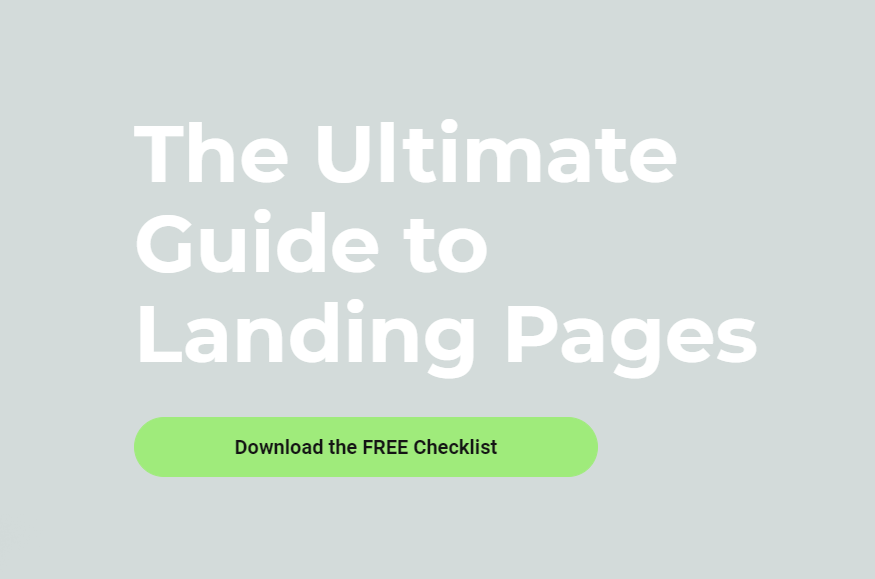
22. Then select the widget you’d like to add to any sections by dragging and dropping it. You can choose between many options such as icons, countdowns, checkout forms, opt-in form, images, call-to-action buttons, and more. Since we already have a CTA button, let’s just change its color. For editing any element on your page, click on the pencil icon. You can always edit by visiting the left-sided menu. But this is another way to customize elements and sections. So I’ll change the color of the CTA button to green and edit the text on it to be “Download the FREE Checklist”.
23. After you add your widgets or customize the existing ones from the template, click on the “Styles” dashboard in the left-sided menu to keep customizing your page.
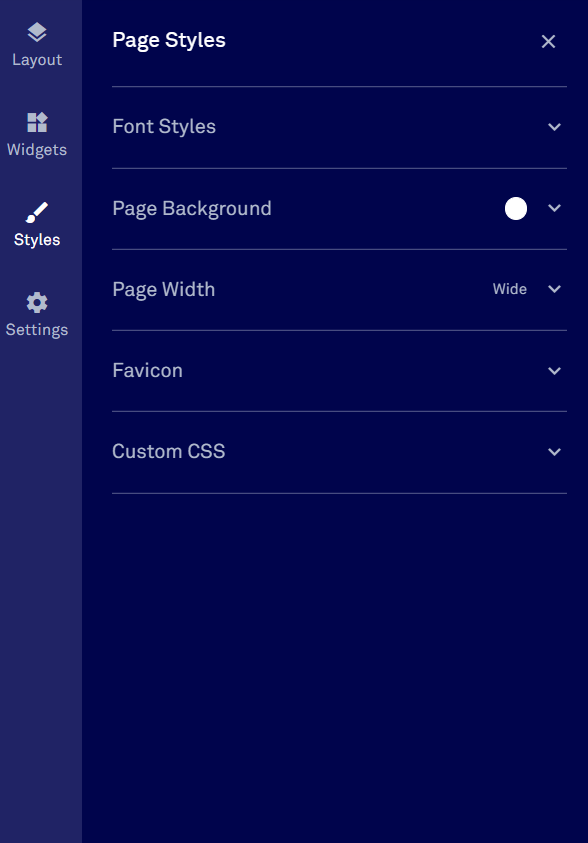
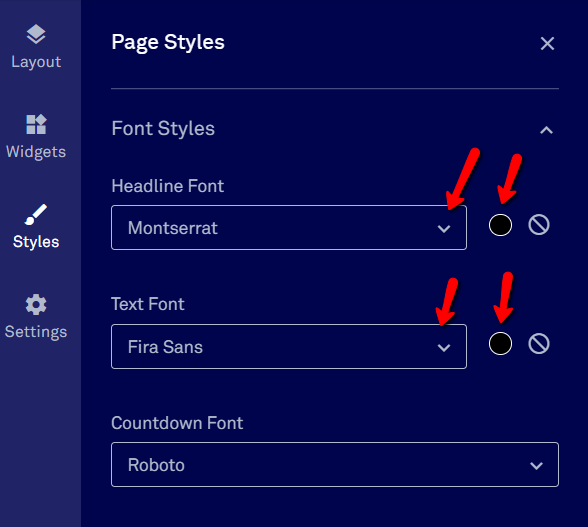
24. Click on “Font Styles” to customize your headlines and body text font styles and sizes. Click on “Headline Font” to select the font style you prefer for your headlines and select the color of your font by clicking on the circle to the right. Also, click on “Text Font” to select your preferred body text font and select the color of your font by clicking on the circle to the right. For the gluten-free cooking page I’m creating, I’ll change the text in the hero section for the headline and subheadline by clicking on the pencil icon. Also, I’ll customize the navigation bar.
25. Click on “Page Background” in the left-sided menu to choose the background of the section you select. This is the same step I mentioned above on how to customize each section’s background but in a different placement on the menu.
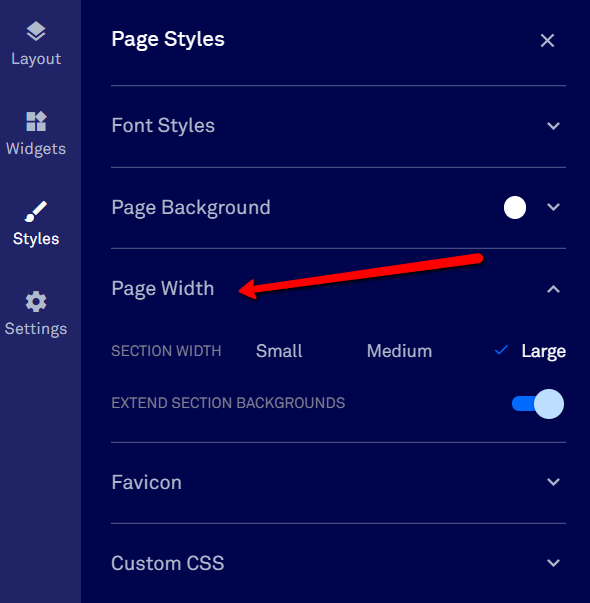
26. Click on the “Page Width” dashboard option in the left-sided menu to select the width of the content of your page. You can choose small, medium or large, but each are settings that you can’t modify manually.
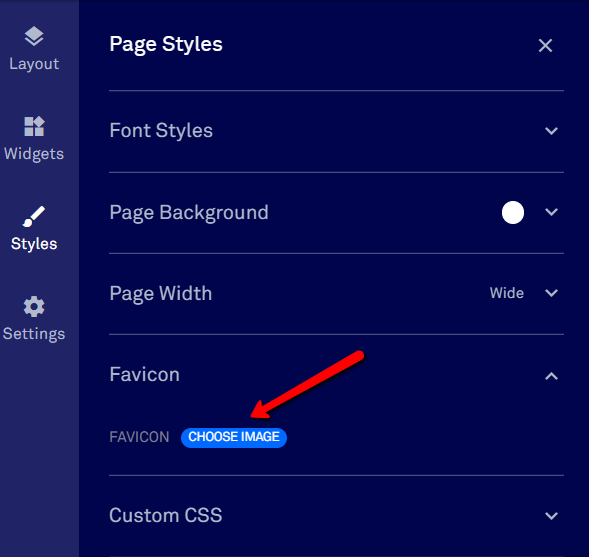
27. Click on the “Favicon” dashboard in the left-sided menu to upload the image that’ll be your page’s favicon.
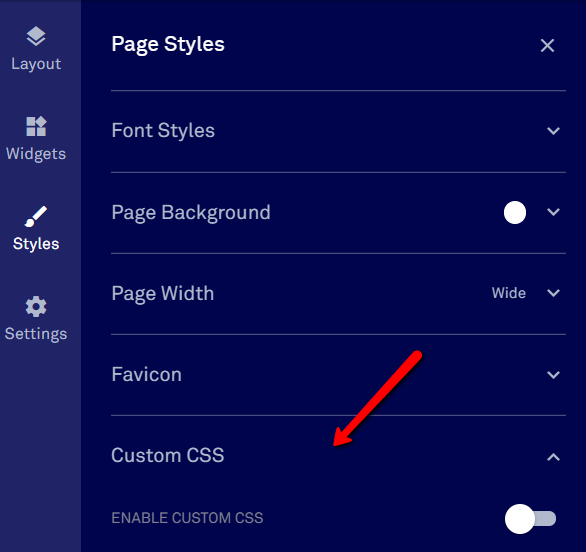
28. If you want to, you can enable custom CSS on your page to code in any styling you’d like. Simply toggle the option in your page’s style settings and add your CSS.
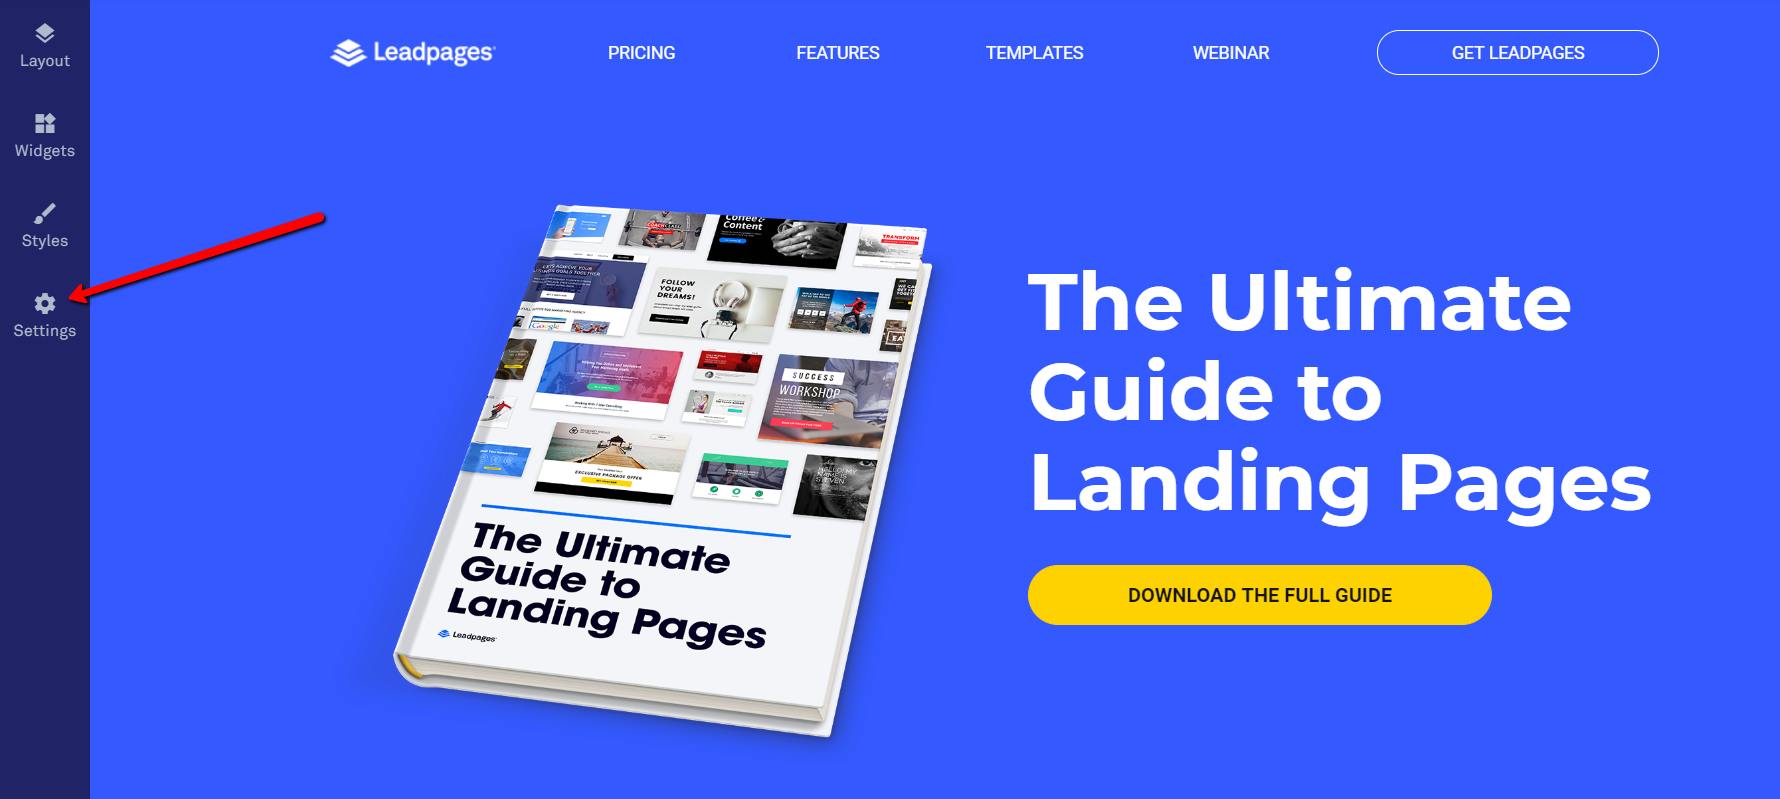
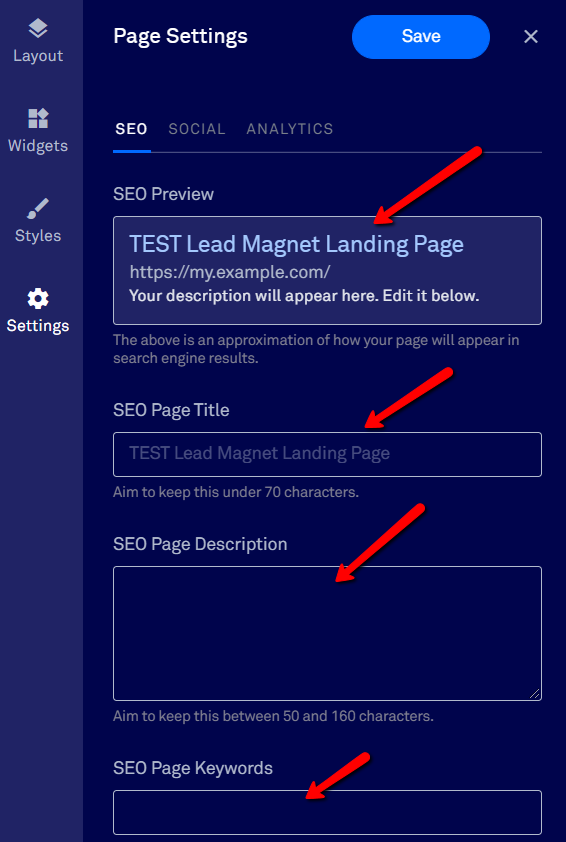
29. To optimize your page for SEO, click on “Settings” in the left-sided menu.
30. Add the text that’ll appear in search engines for your lead magnet landing page in the SEO Preview field. Then, add your SEO page title and keep it under 70 characters. And finally, add your SEO page description and keywords. After finishing setting up your SEO settings, click on the “SAVE” button so you don’t lose your changes.
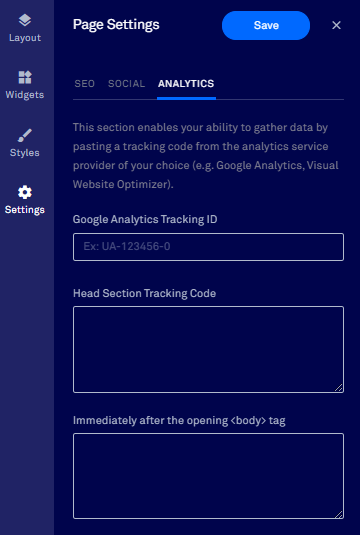
31. To add the Google Analytics tracking code, just paste your tracking ID in the “Google Analytics Tracking ID” field. Another option to do that—use Google Tag Manager—a free tool that lets you manage marketing tags on your website without having to modify the code. Paste the Google Tag Manager code in the “Head/Body Section Tracking Code” and with it you can upload any other code and display it on your website. These tracking codes will provide you with helpful metrics to get more data on your pages and forms’ performance once they’re live.
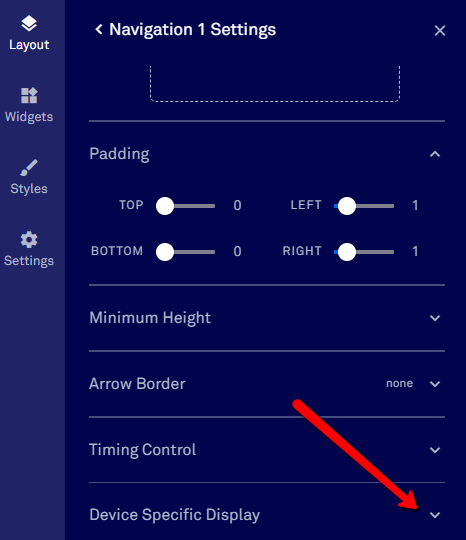
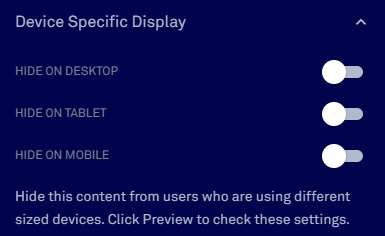
32. Leadpages’ templates are designed to be mobile responsive, however, each section can be optimized for mobile responsiveness for even greater control. For this, simply click on the section of your page you wish to optimize for mobile. Below each section, there’s a gear icon next to “Section Style”. Click on it, scroll down and click on the “Device Specific Display”. And there, you can manage to hide or display a specific section from your mobile, desktop or tablet.
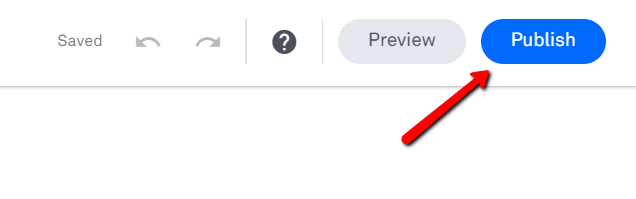
33. Once you finish creating, customizing, and editing your lead magnet landing page, click on the “Preview” button at the top right corner to see how your page will look like live.

34. When your page is ready to go live, hit the “Publish” button on the top right corner of your page. But that’s not the end.
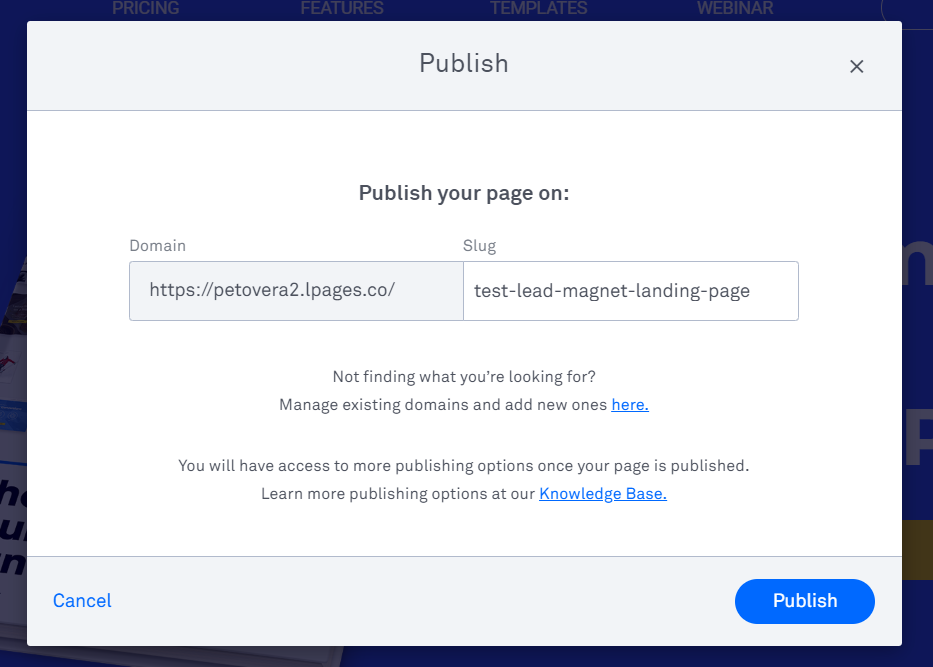
35. Add your domain and slug for your page’s URL and then click “Publish”.
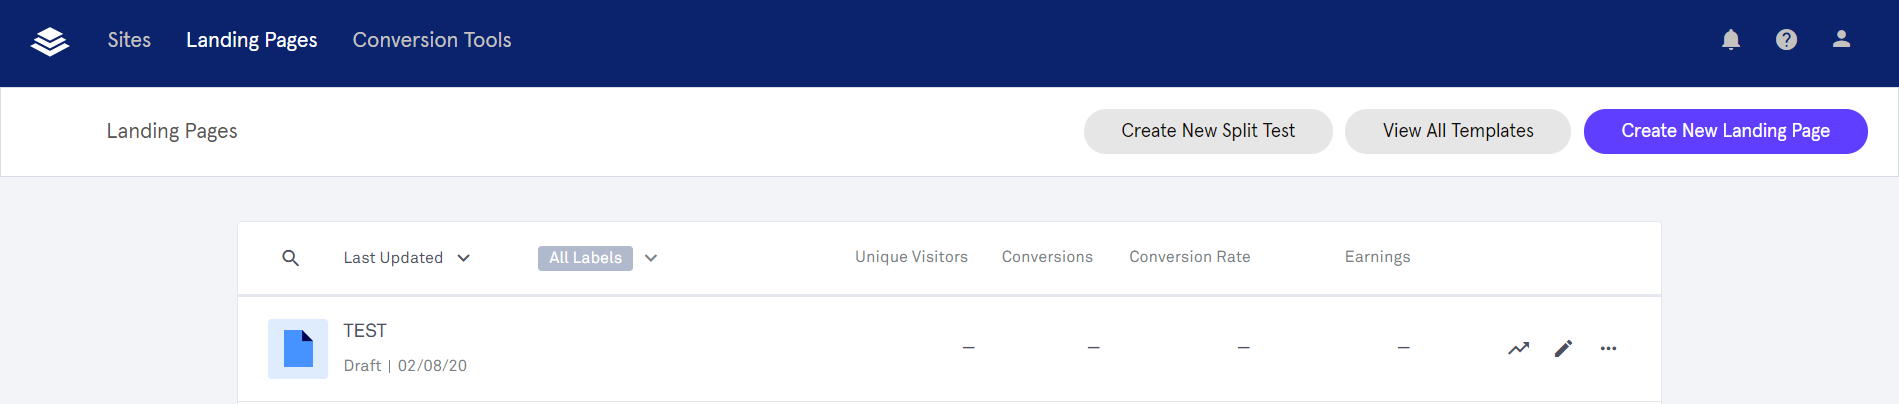
36. After publishing your lead magnet landing page, you can always log in to your Leadpages account, and edit your page by clicking on the page.
Conclusion
You don’t need to be an expert designer to create a landing page to offer prospects your lead magnet.
While designing a perfectly beautiful page sounds great, building a high-converting landing page is more important.
Sure, all elements of the page must feel integrated, there needs to be consistency with spacing, all images should be high-resolution, and you should have impeccable copy. But even if you have everything in place, your page won’t convert if for example, the “Download” button doesn’t work.
More than a beautiful design, then, you need to craft a landing page that converts. And the best tool to do that is without a doubt Leadpages.
But if you don’t have time to design your lead magnet landing page, reach out to AutoGrow and our Full-Stack Marketing Team will set up the perfect landing pages for you and start automating leads so you can skyrocket sales in 2020.
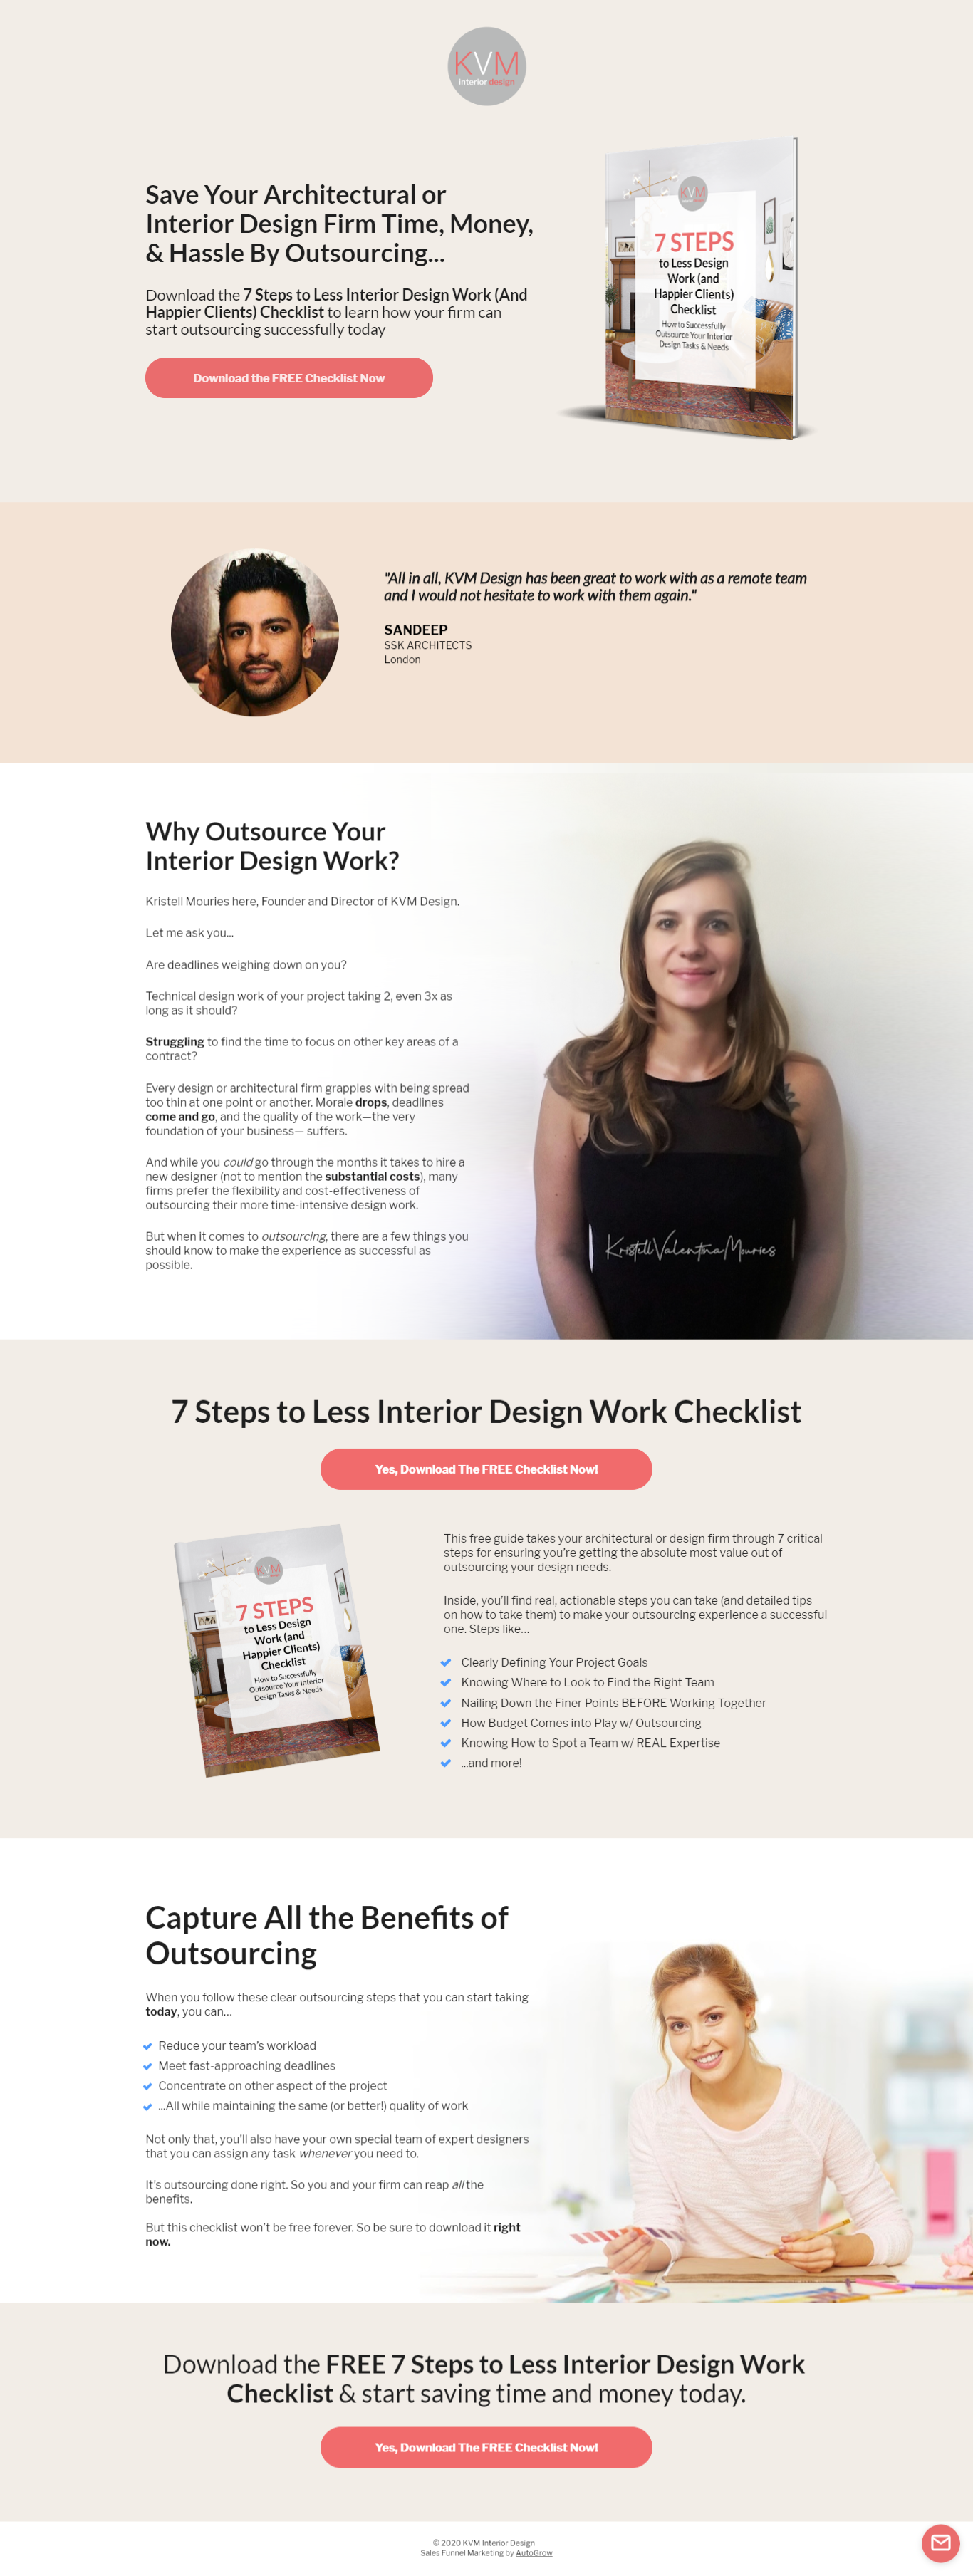
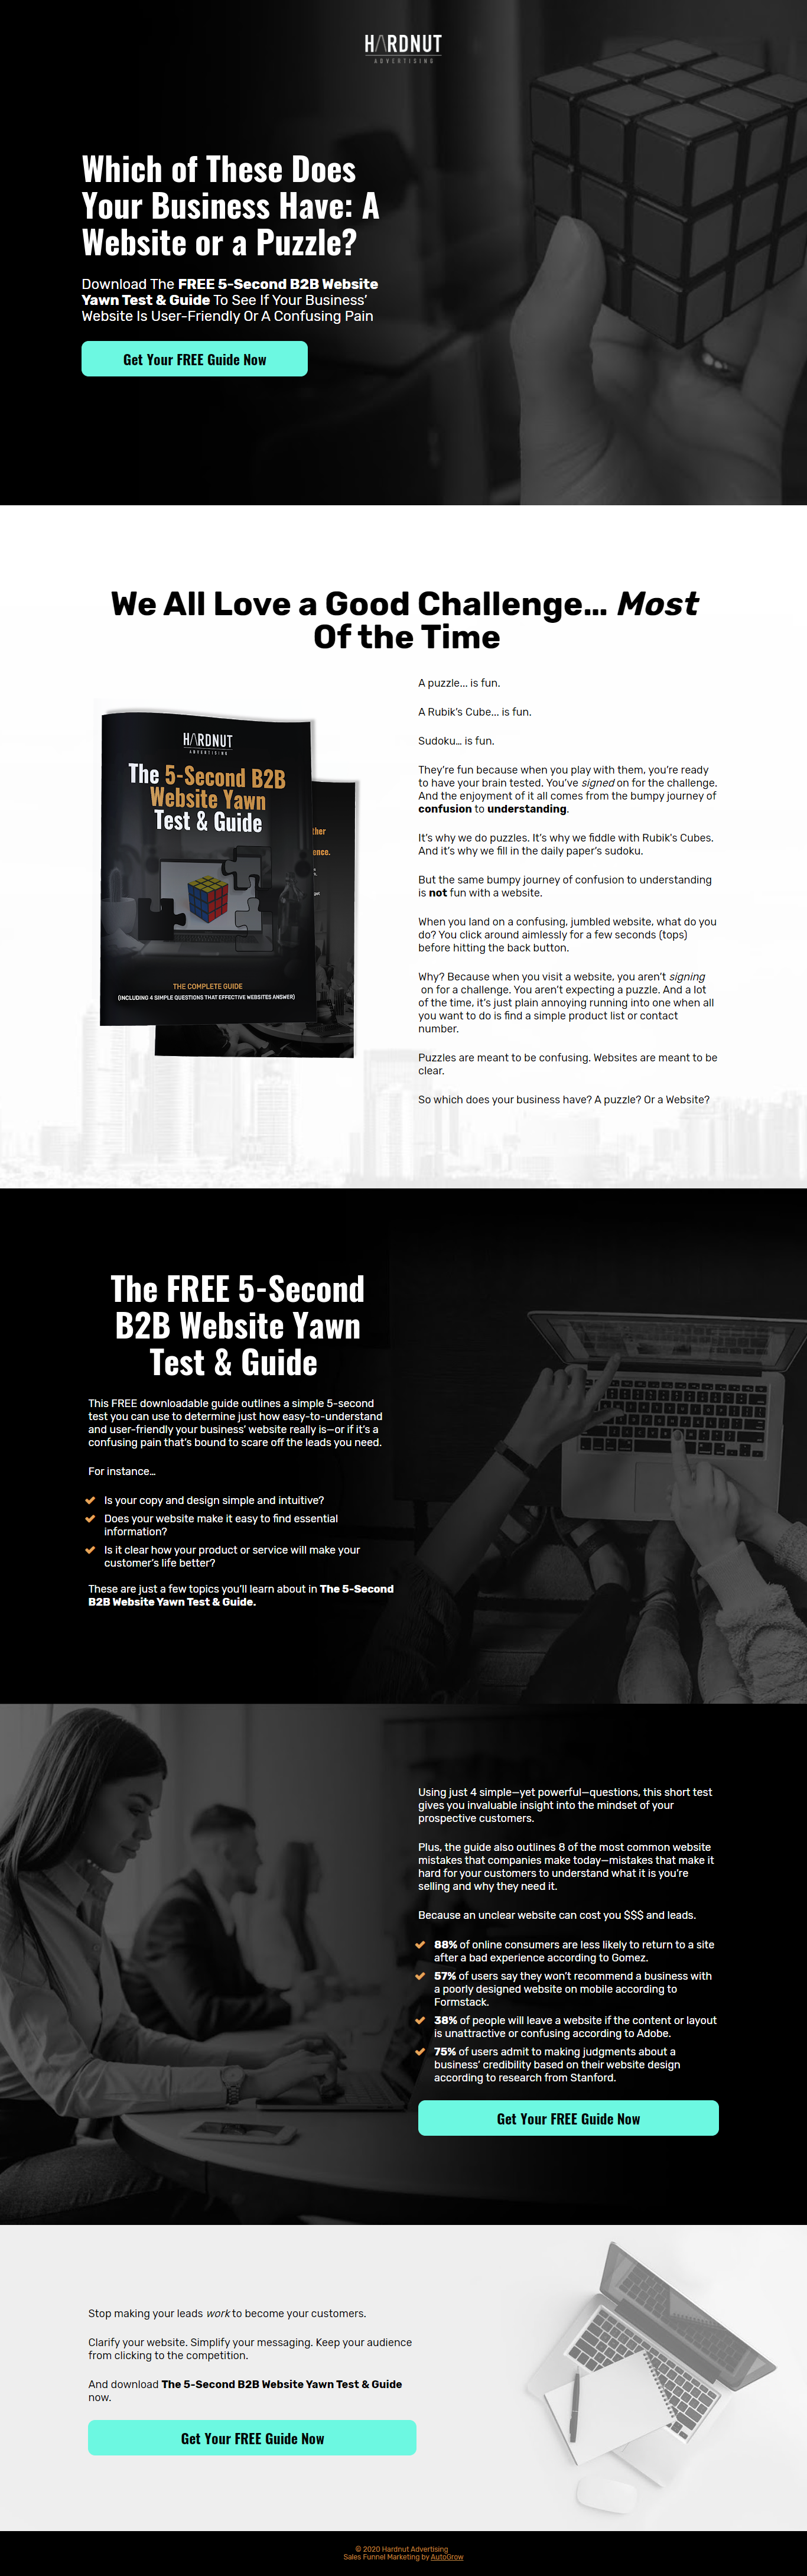
For instance, here are some of the landing pages that our designers have created in Leadpages and that have already started converting for our clients…
Now tell me something, do you prefer consuming tutorials in the form of a guide or do you prefer watching a tutorial video?
Let me know in the comments below.
Keep funnelin’, stay focused,
Mariana Lessmann